5 Stand

Manatee Gun & Archery Club logo

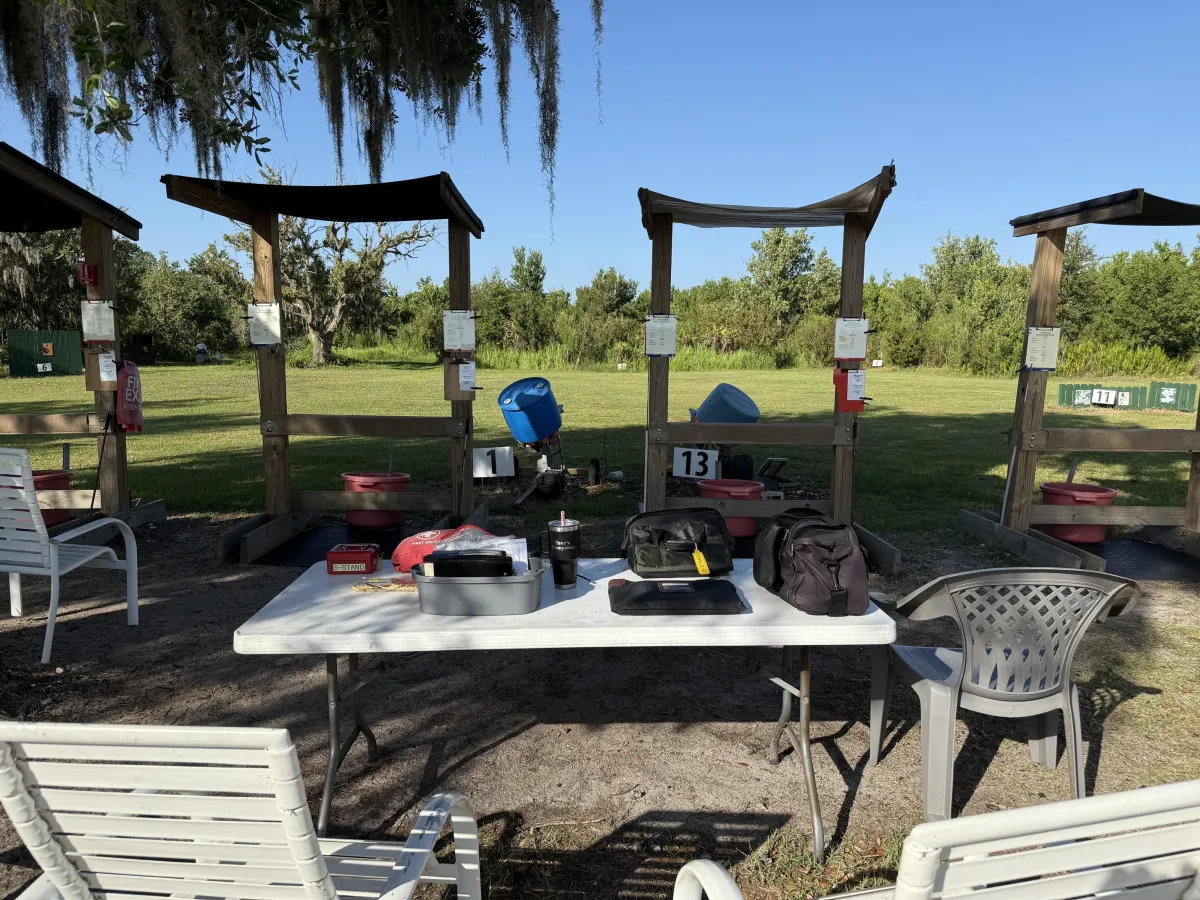
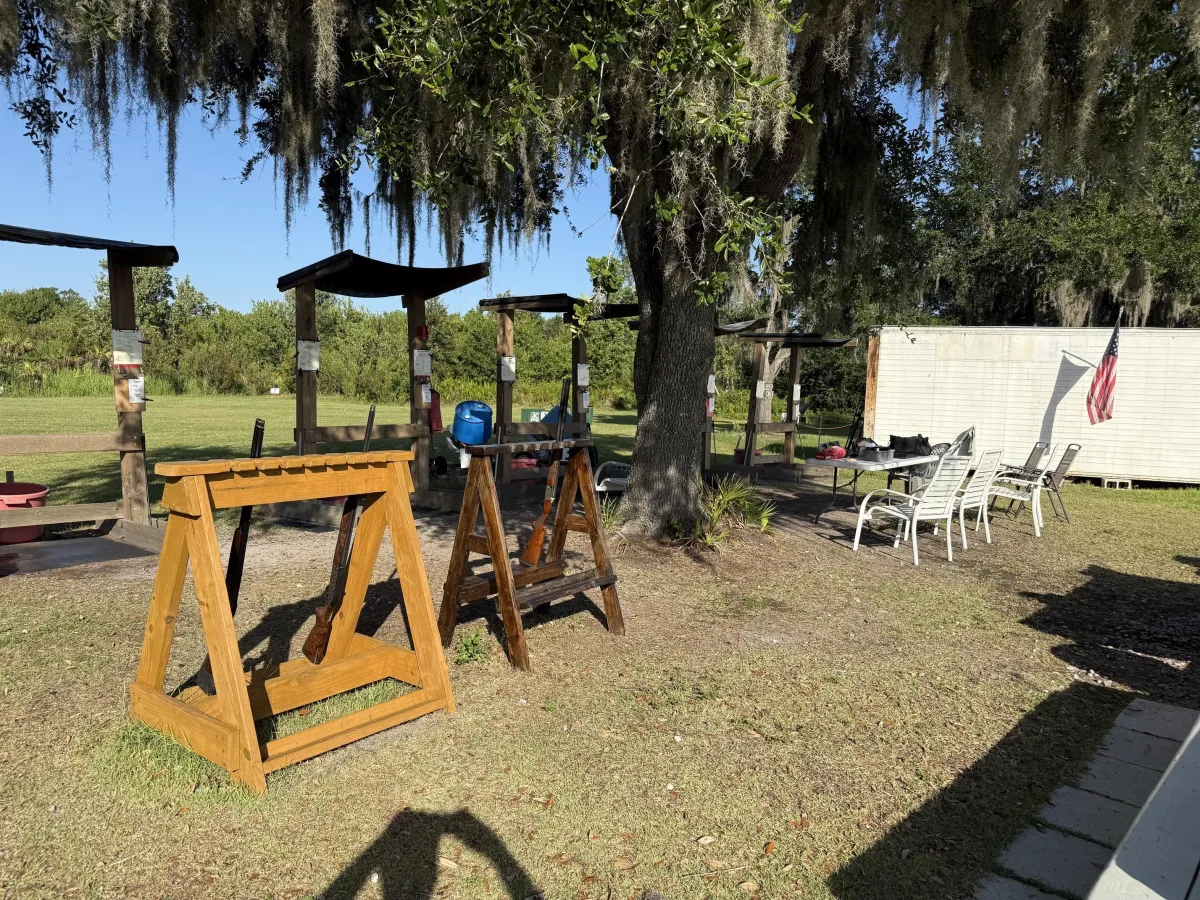
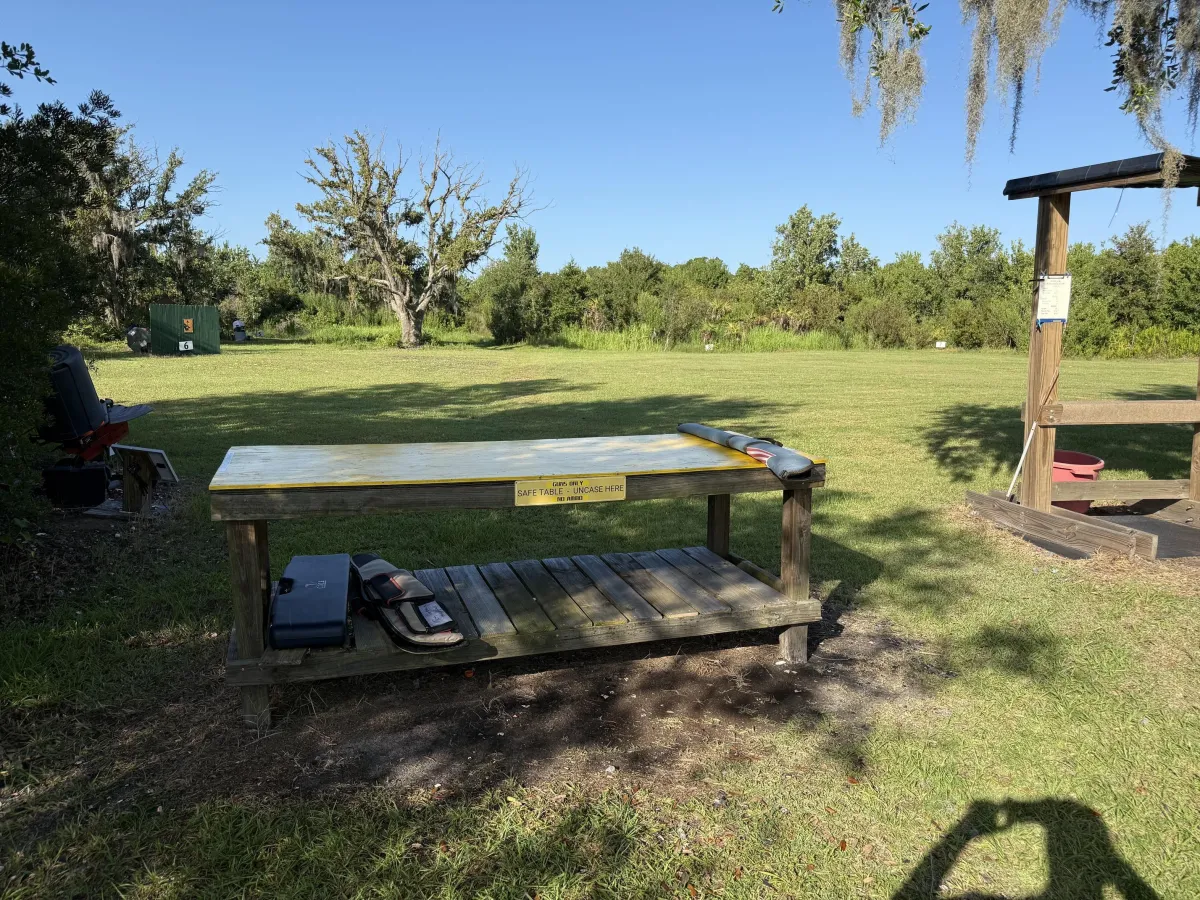
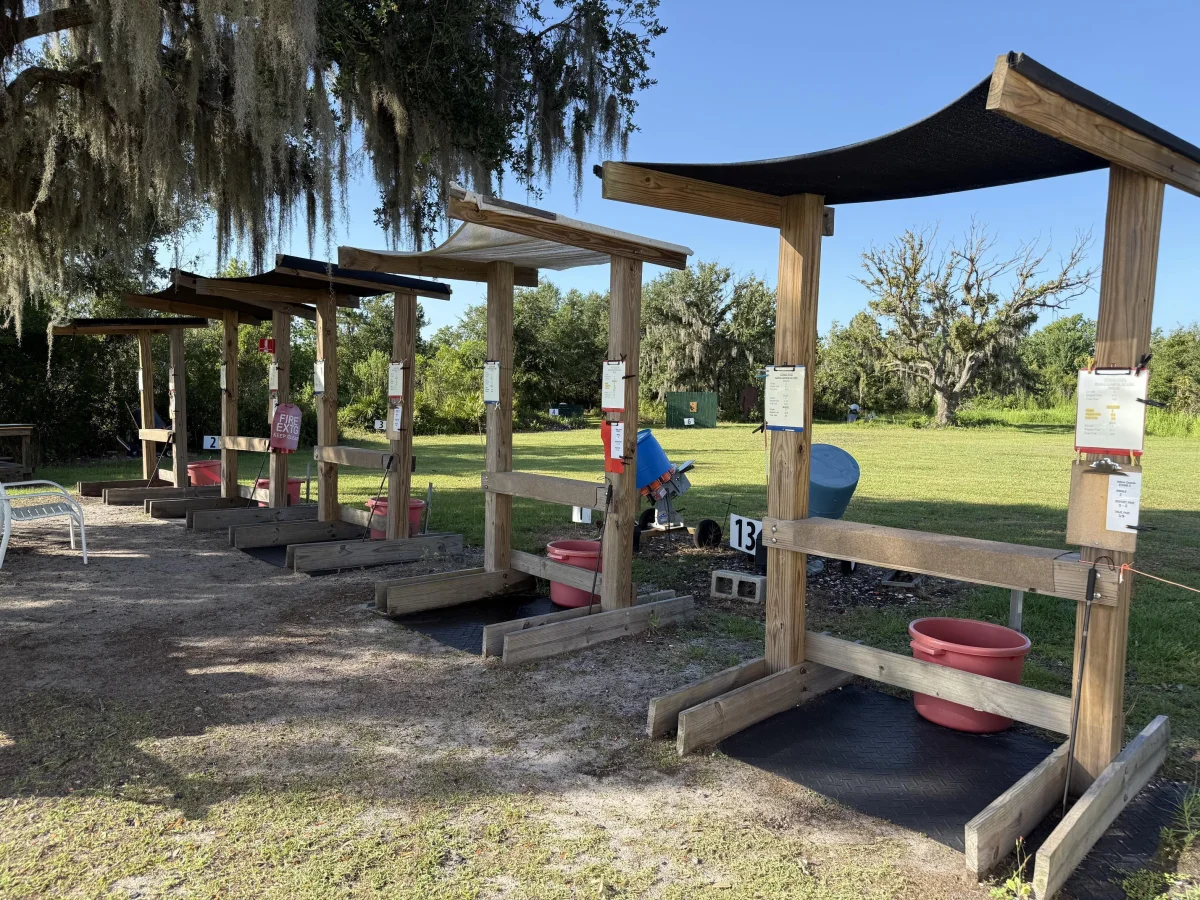
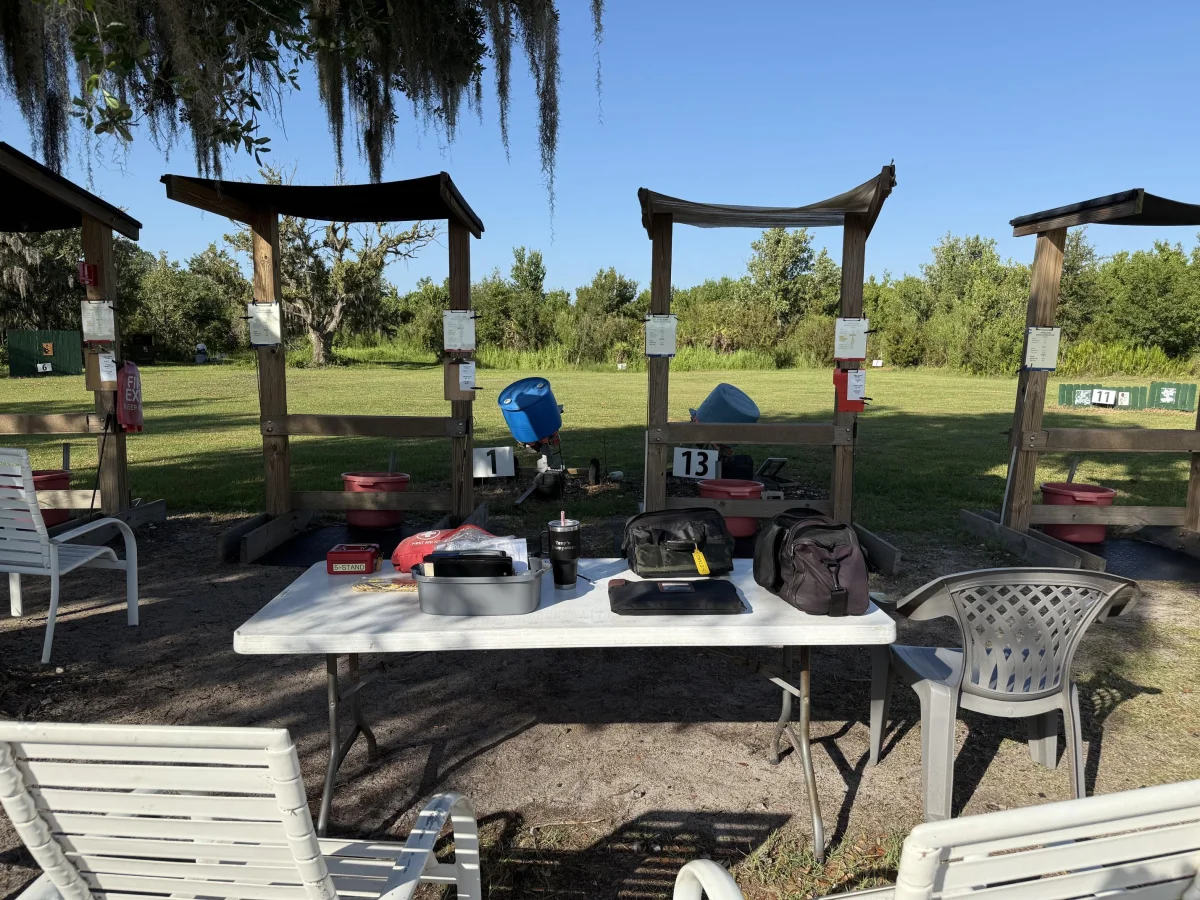
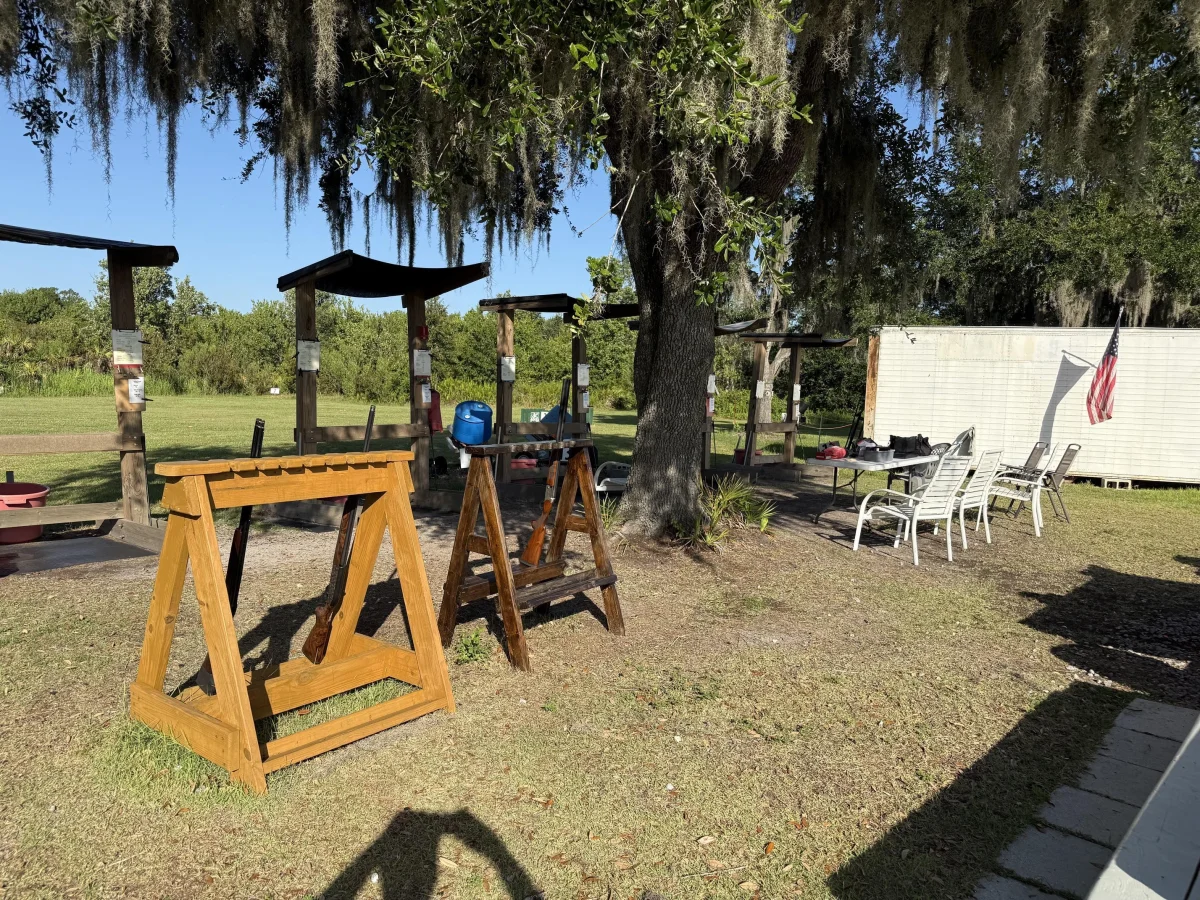
Five-Stand (aka 5-Stand), is a clay target game that is fun and challenging to any shot gunner.  The 5-Stand shotgun format combines the Best of Trap, Sheet, and Sporting Clays.  The game consists of 5 different shooting stands arranged in line with each other, 5-Stand can have up to 5 shooters, one at each stand participating in a round.  Each shooter gets to shoot at 5 different clay target presentations at each stand.  A full round consists of 25 clay targets and shells per shooter. 

The shooting fee is $8.25 per round for members and $10.75 for guests.  


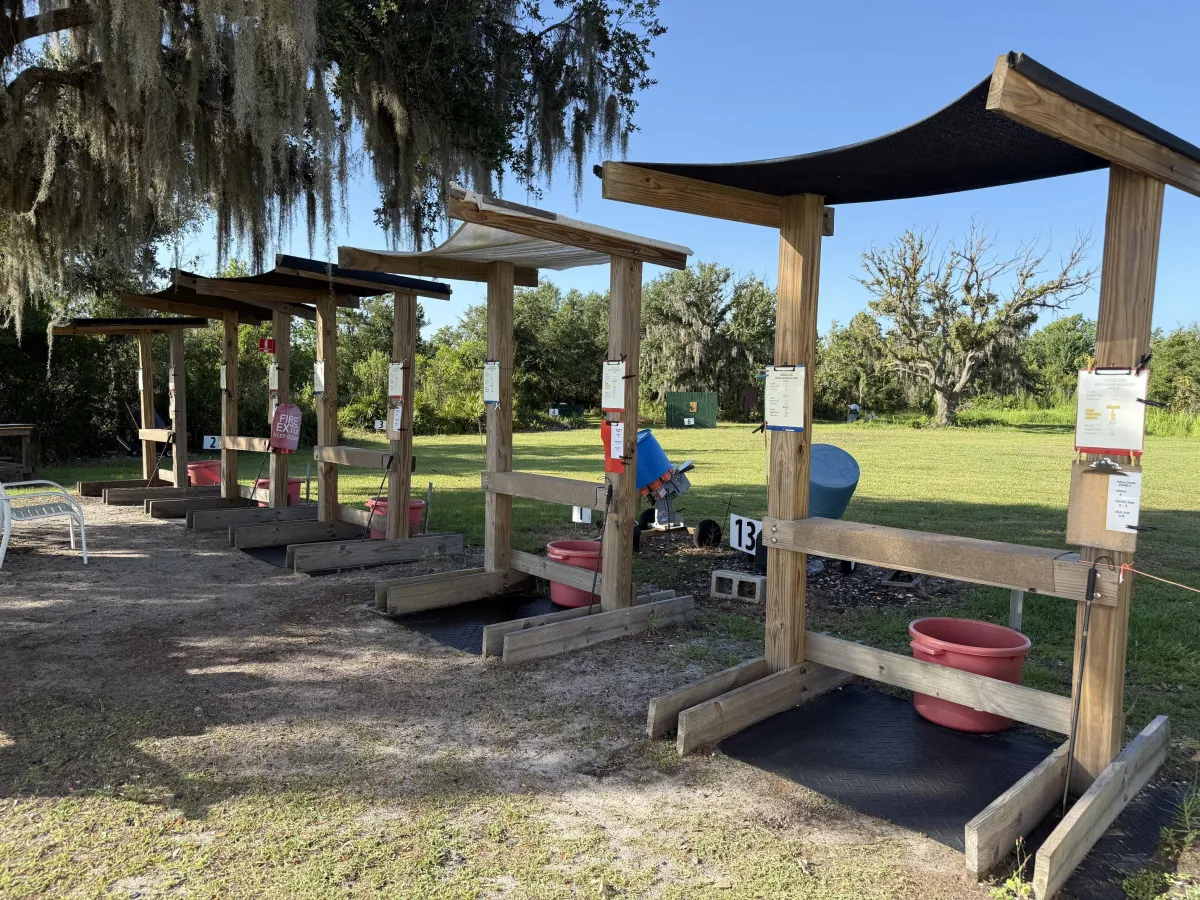
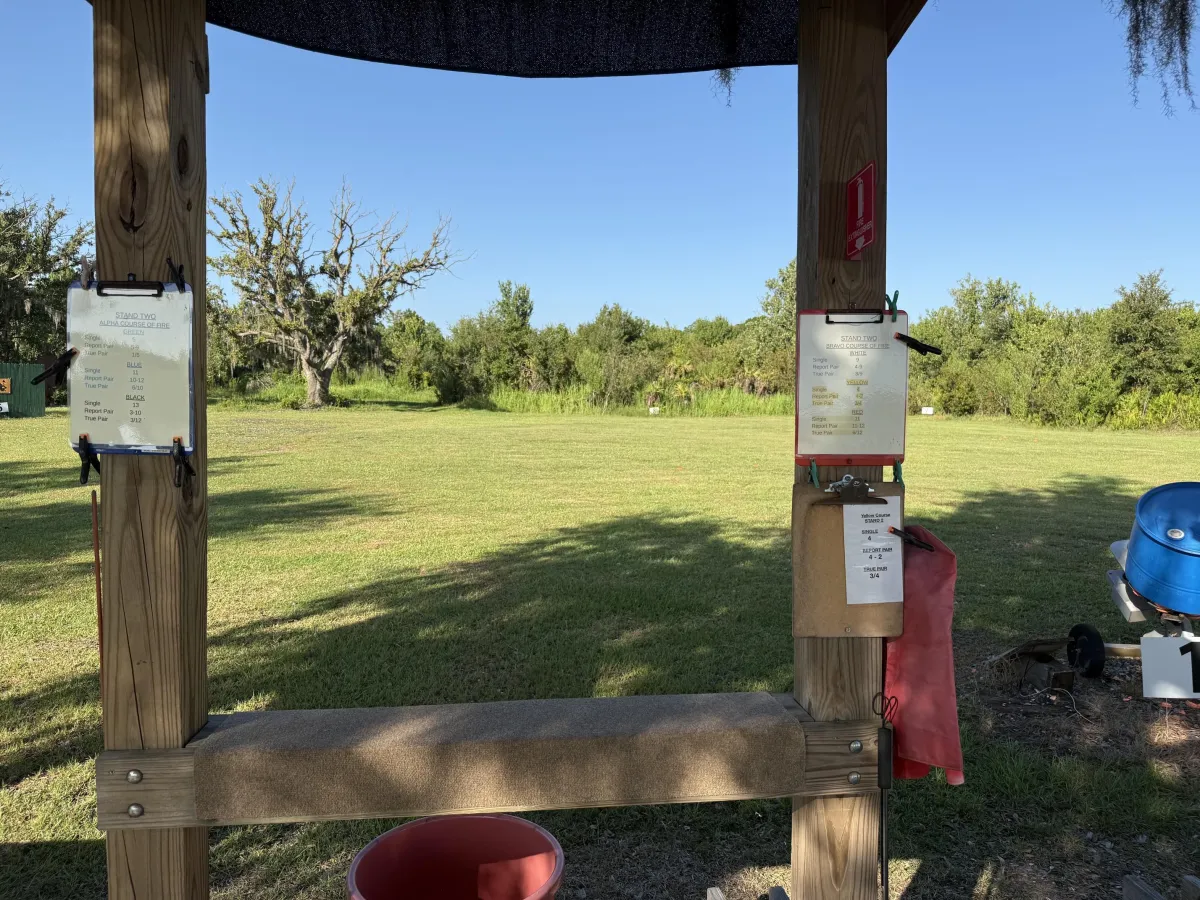
Our 5-Stand features 13 traps with a large variety of throws including trap, battue, quartering out, crossers and rabbits.  We have three difficulty levels in the six courses of fire that include two novice (Green & White), two intermediate (Blue & Yellow) and two difficult (Black & Red).  All courses of fire include singles, report and true pairs.  Please limit shot sizes to 7-1/2, 8 or 9. 


Peak Season Hours: Thursday - Sunday (9am to 2pm).

Off Season Hours: Friday - Sunday (9am - 1pm).  


We conduct both Shotgun 5-Stand Basic & Advanced Training Clinics held on the 2nd & 3rd Thursday’s of every month. 


Also, we run a 5-Stand Fall League, Winter League and Summer Challenge 5-Stand clay shooting events for our shooters throughout the year.


Our RSOs/Trappers look forward to pulling for you at our MGAC 5-Stand.


5-Stand Days/Hours/Events

August 1st - 30th 2026

Hours 9am to 1pm.

01 Aug 26: Saturday, Open, 9am to 1pm.

02 Aug 26: Sunday, Open, 9am to 1pm.

05 Aug 26: Wednesday - Howell Traps, noon to 5pm, sign up under Maint.

06 Aug 26: Thursday - Howell Traps, 8am to 5pm, sign up under Maintenance.

O7 Aug 26: Friday, Open, 9am to 1pm.

08 Aug 26: Saturday, Open, 9am to 1pm.

09 Aug 26: Sunday, Open, 9am to 1pm.

13 Aug 26: Thursday, Closed, 5-Stand Maintenance, 9am to 1pm. Sign up

under Maintenance.

14 Aug 26: Friday, Open, 9am to 1pm.

15 Aug 26: Saturday, Open, 9am to 1pm, NO 4H USE.

16 Aug 26: Sunday, Open, 9am to 1pm.

20 Aug 26: Thursday, Closed, 5-Stand Maintenance, 9am to 1pm, Sign up

under Maintenance.

21 Aug 26: Friday, Open, 9am to 1pm.

22 Aug 26: Saturday, Open, 9am to 1pm.

23 Aug 26: Sunday, Open, 9am to 1pm.

27 Aug 26: Thursday, Closed, 5-Stand Committee meeting, 9:30am to noon.

28 Aug 26: Friday, Open, 9am to 1pm.

29 Aug 26: Saturday, Open, 9am to 1pm.

30 Aug 26: Sunday, Open, 9am to 1pm.

5-Stand Hours in September on Fri, Sat & Sun return back to 9am to 2pm.

04 Sep 26: Friday, Open, 9am to 2pm.

05 Sep 26: Saturday, Open, 9am to 2pm.

06 Sep 26: Sunday, Open, 9am to 2pm.

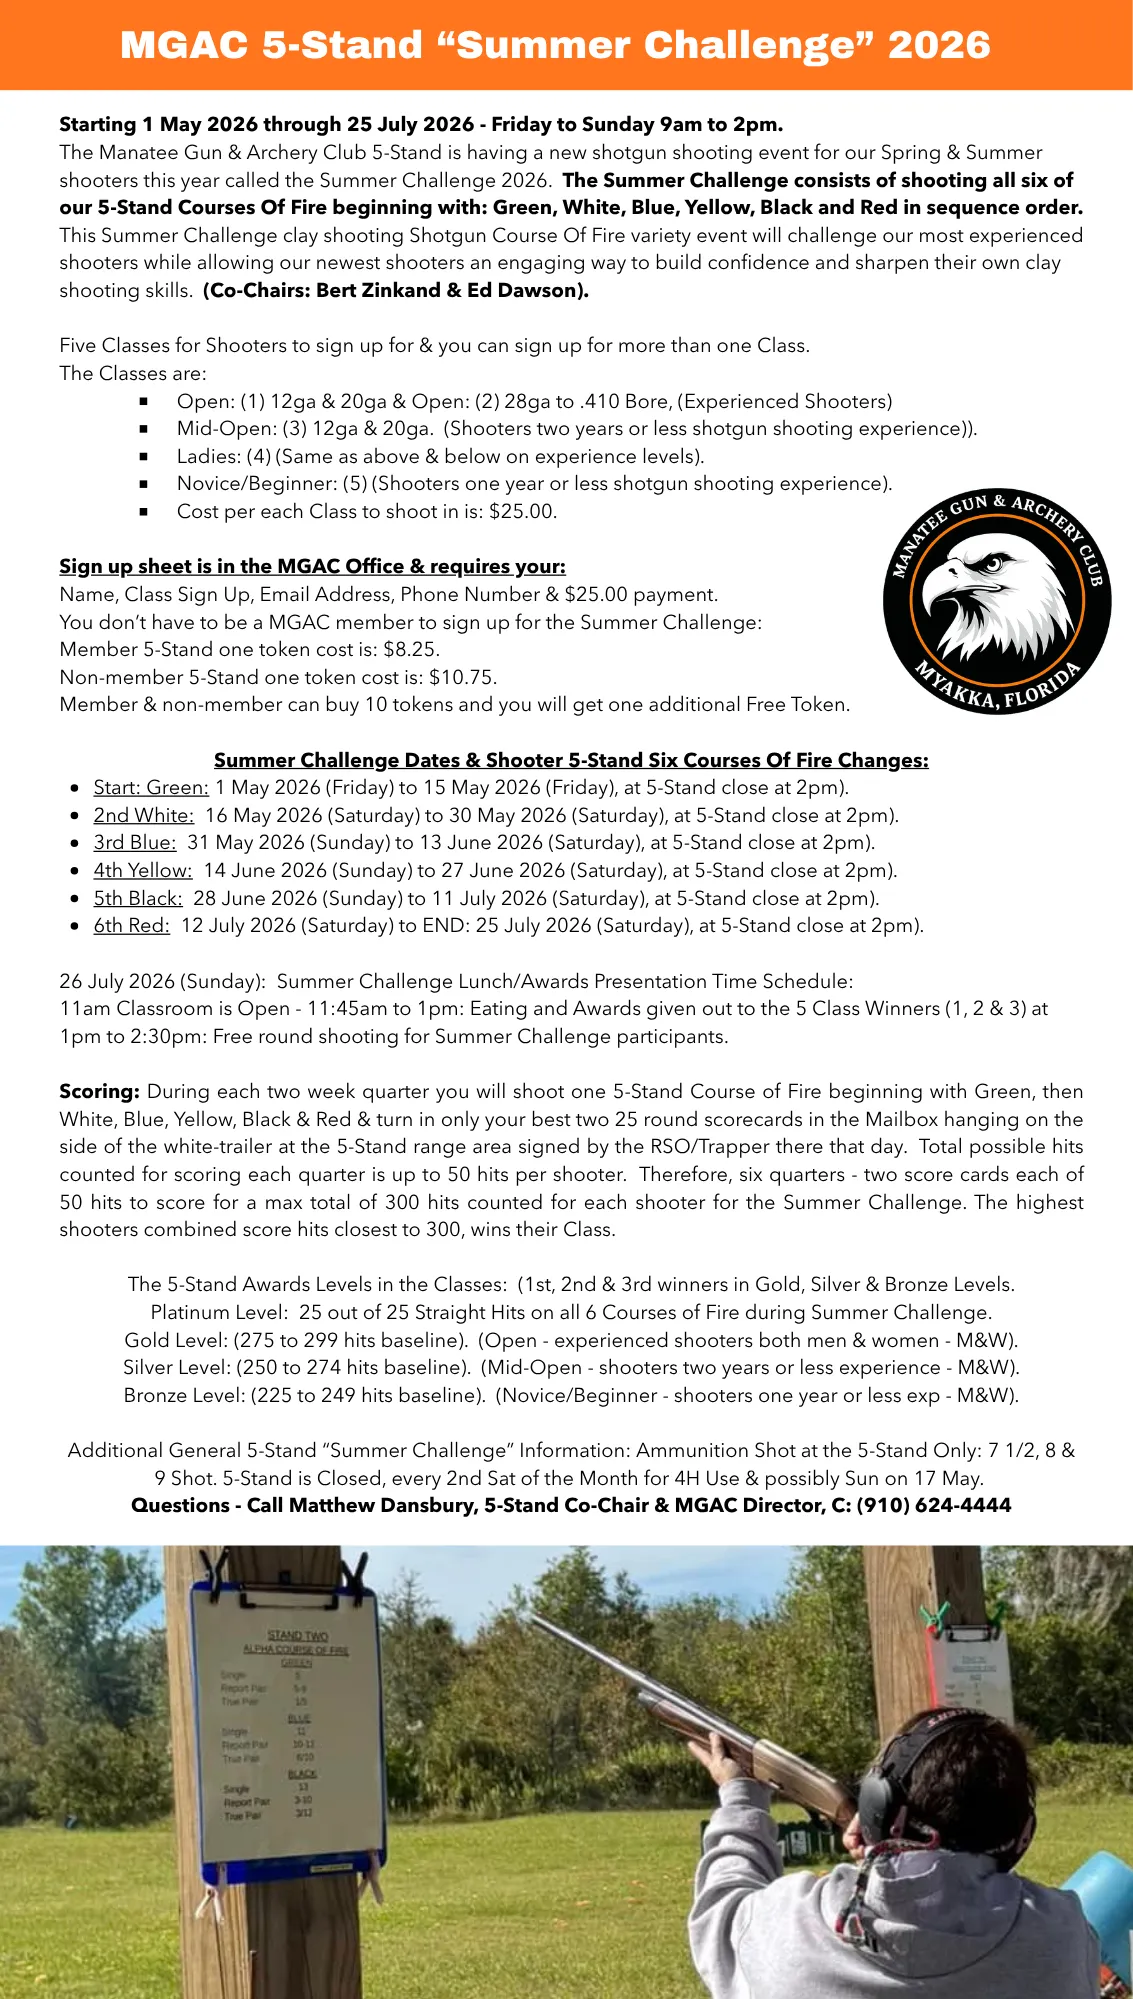
The Summer Challenge consisted of shooting all six of our 5-Stand Courses of Fire

beginning with: Green, White, Blue, Yellow, black, and red in sequence order.

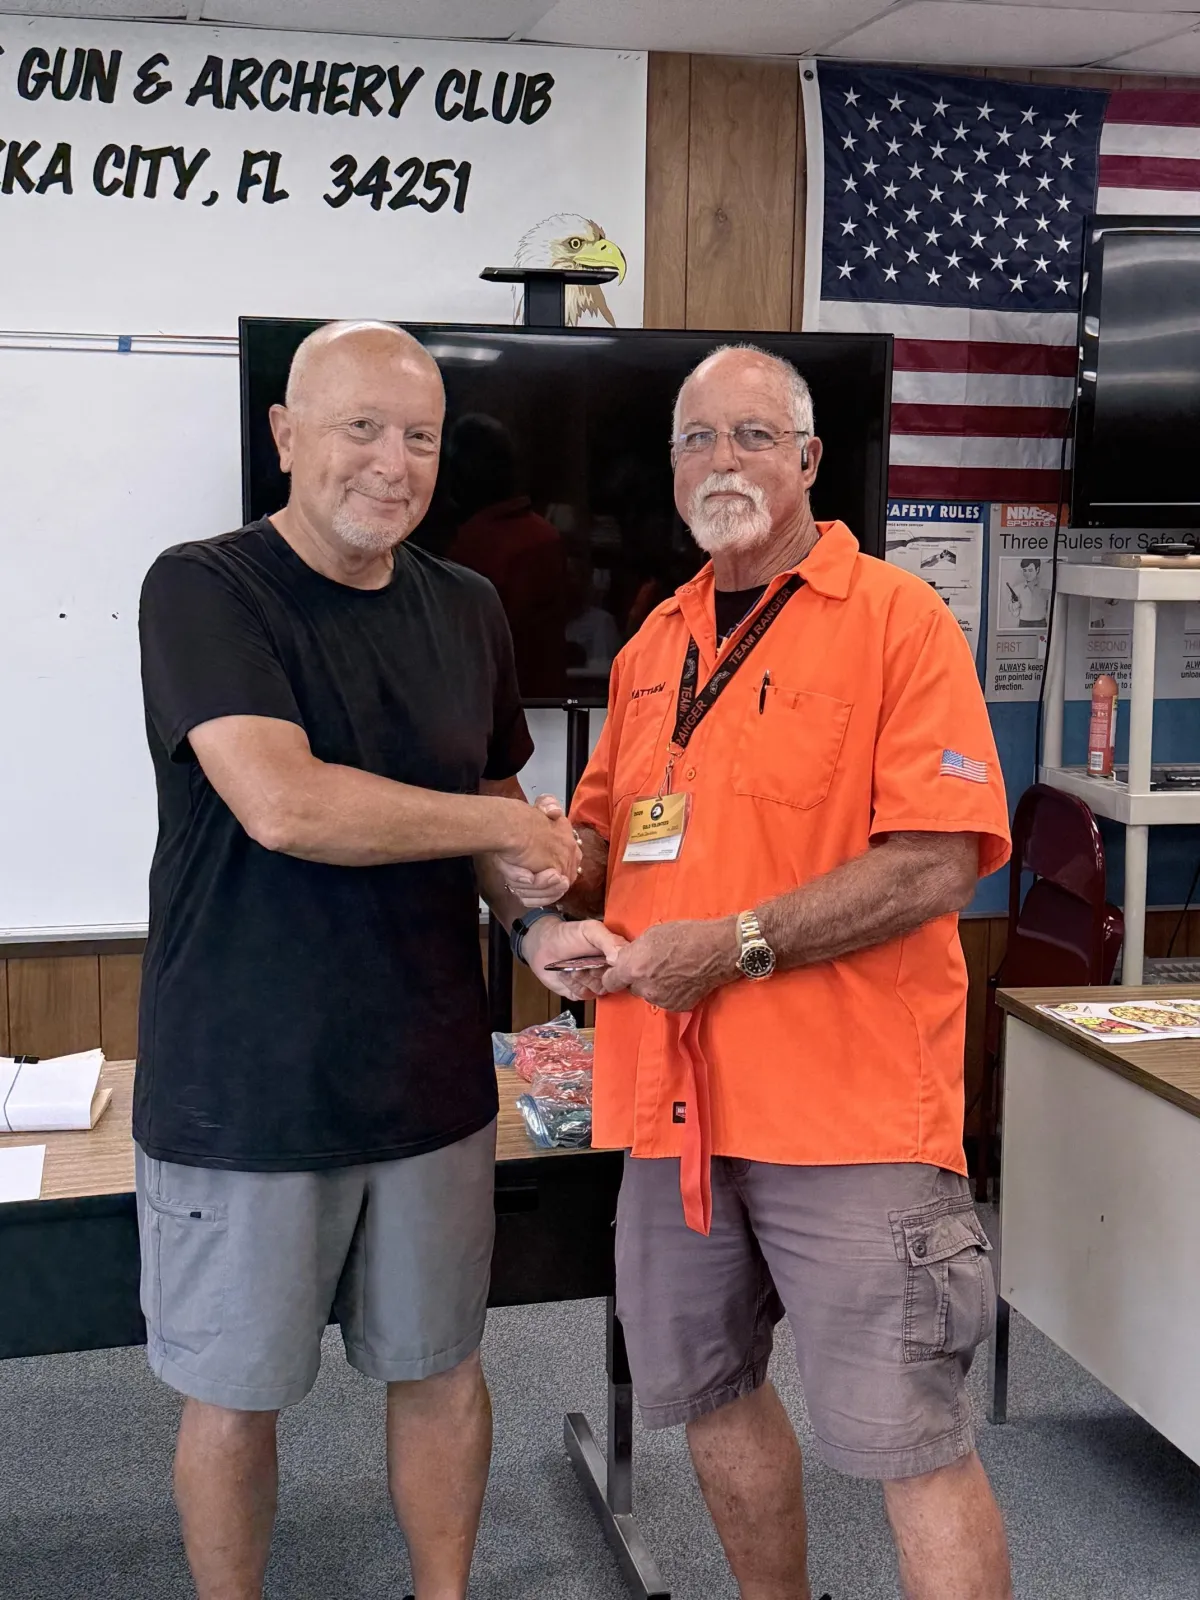
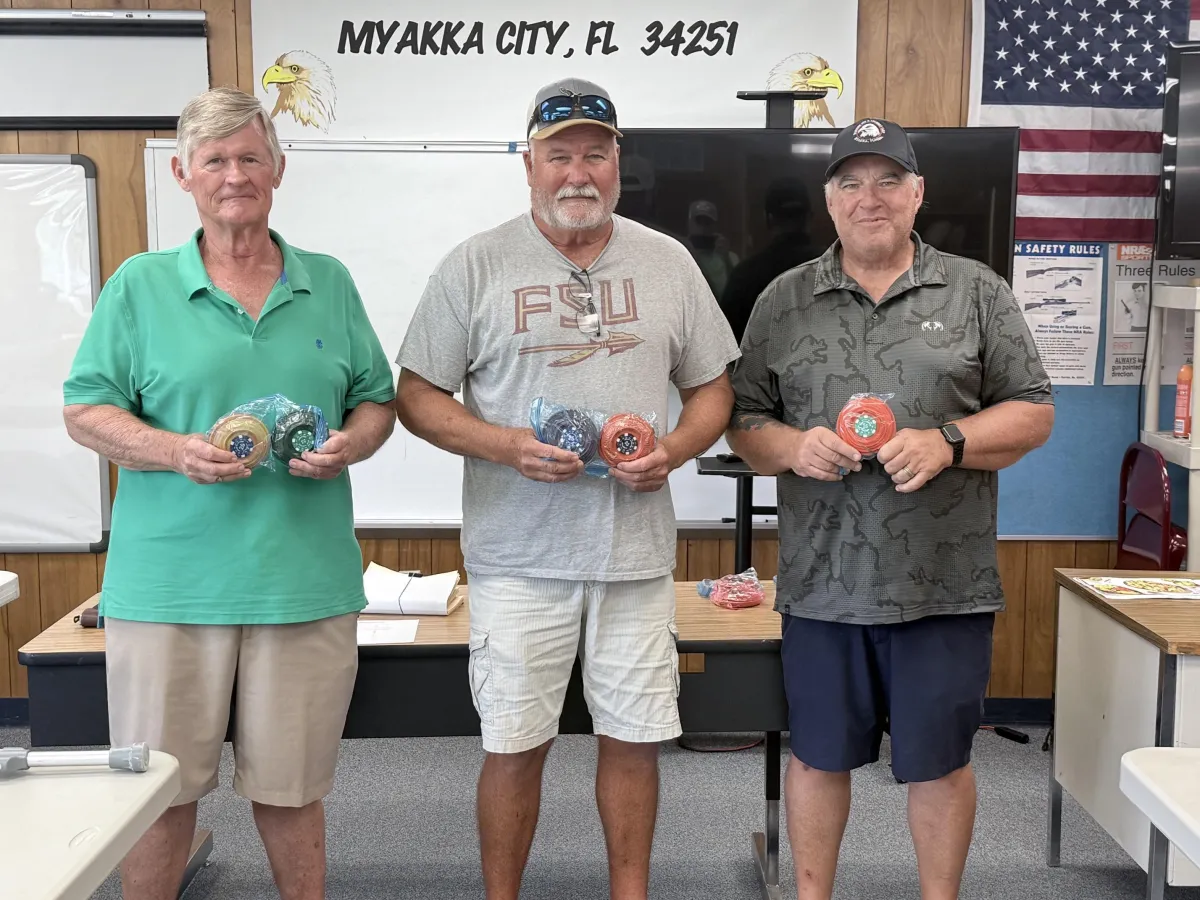
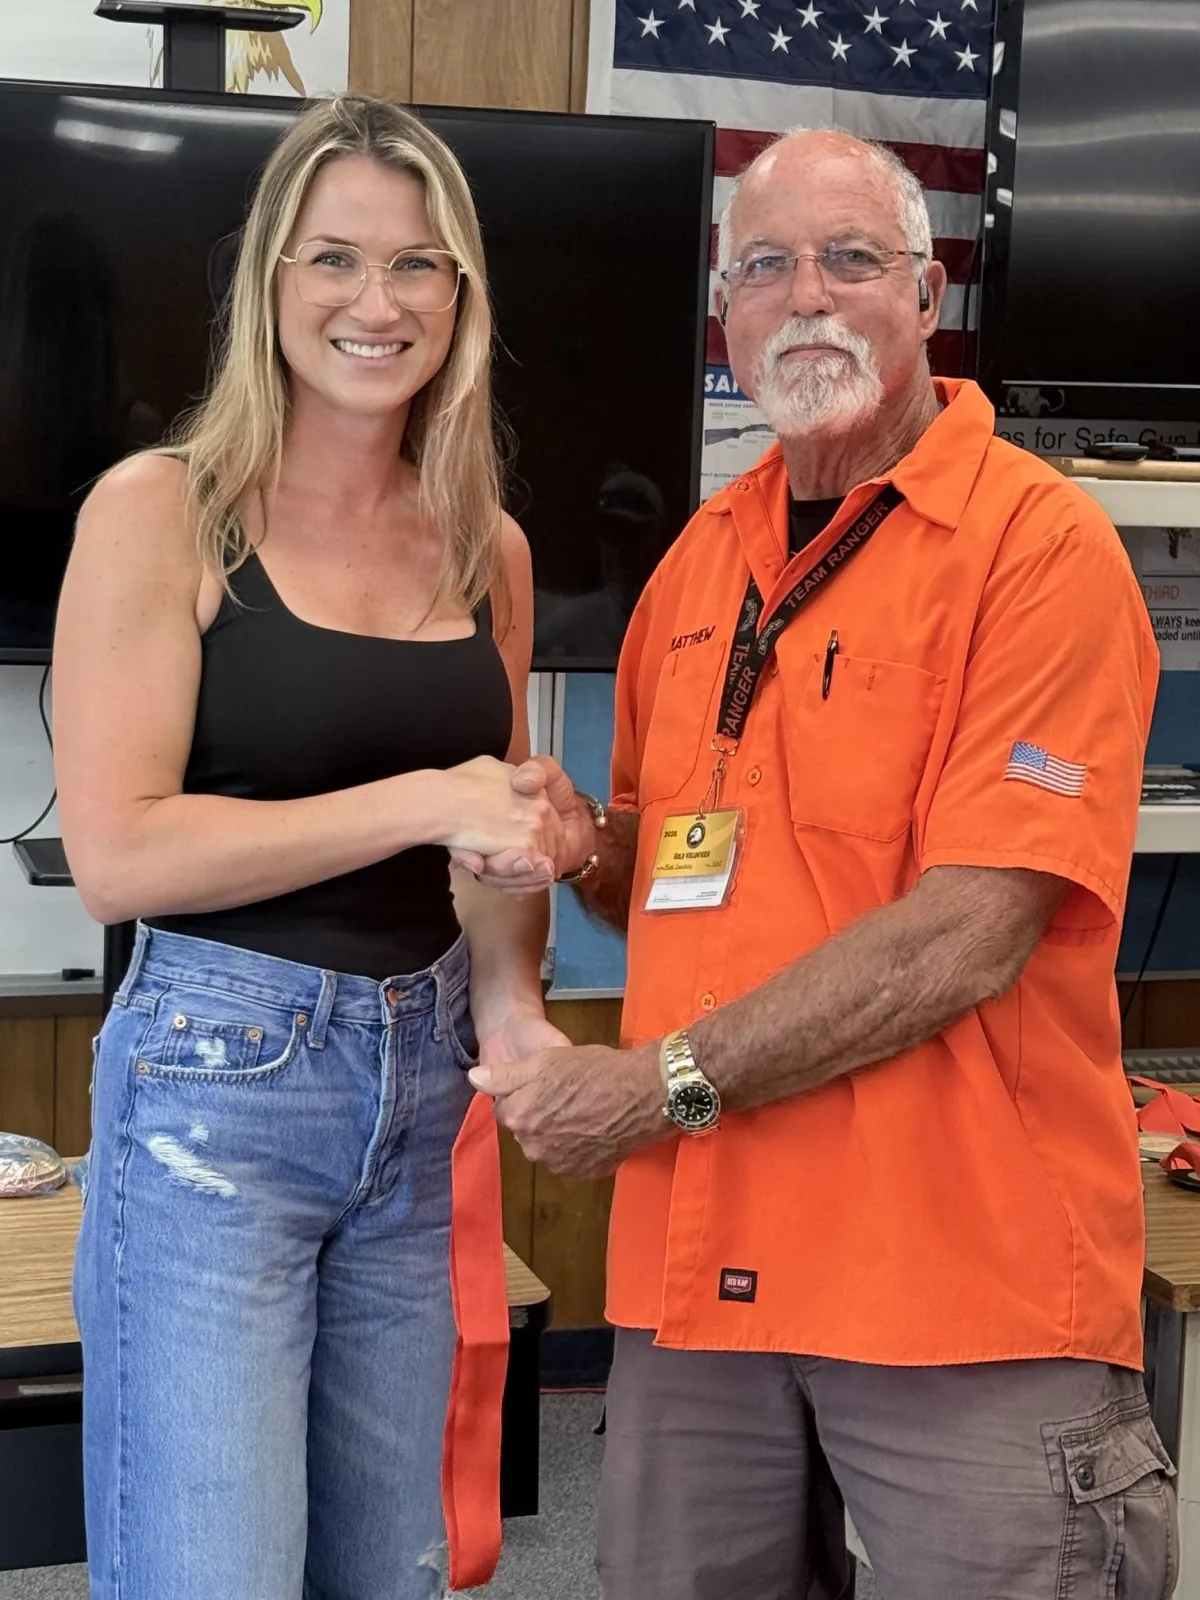
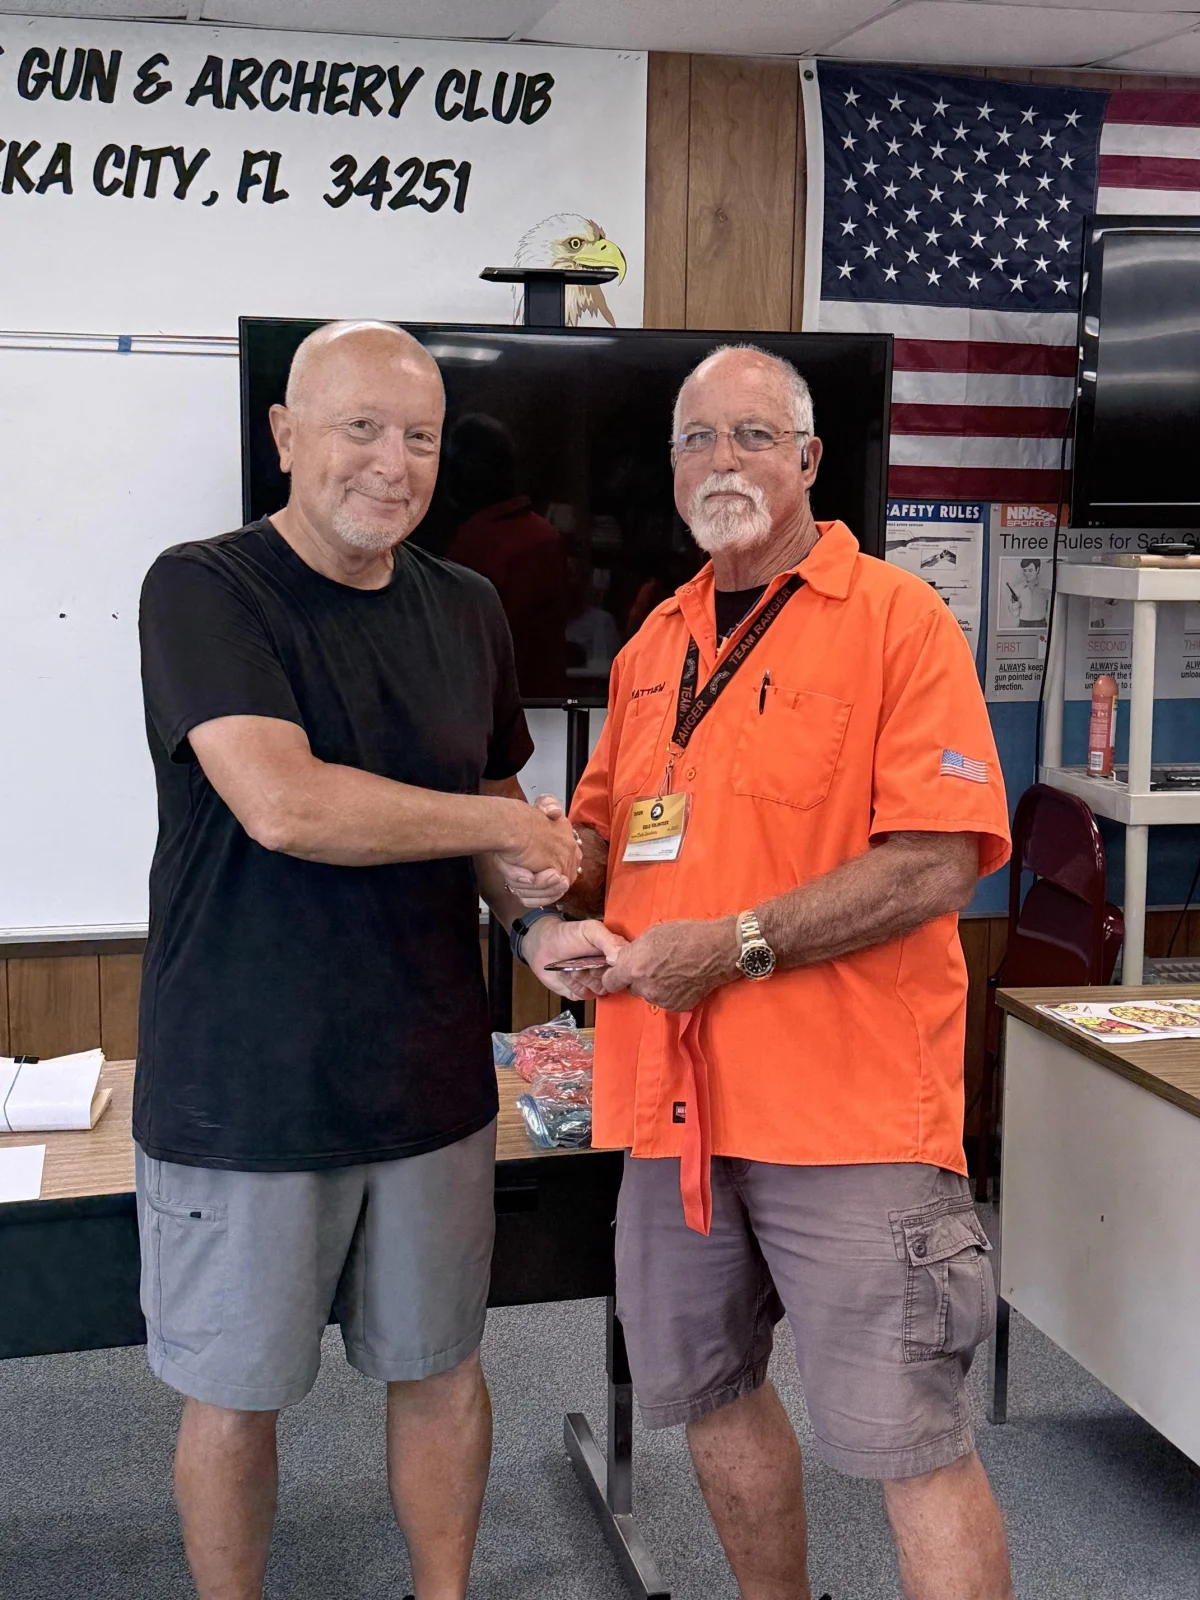
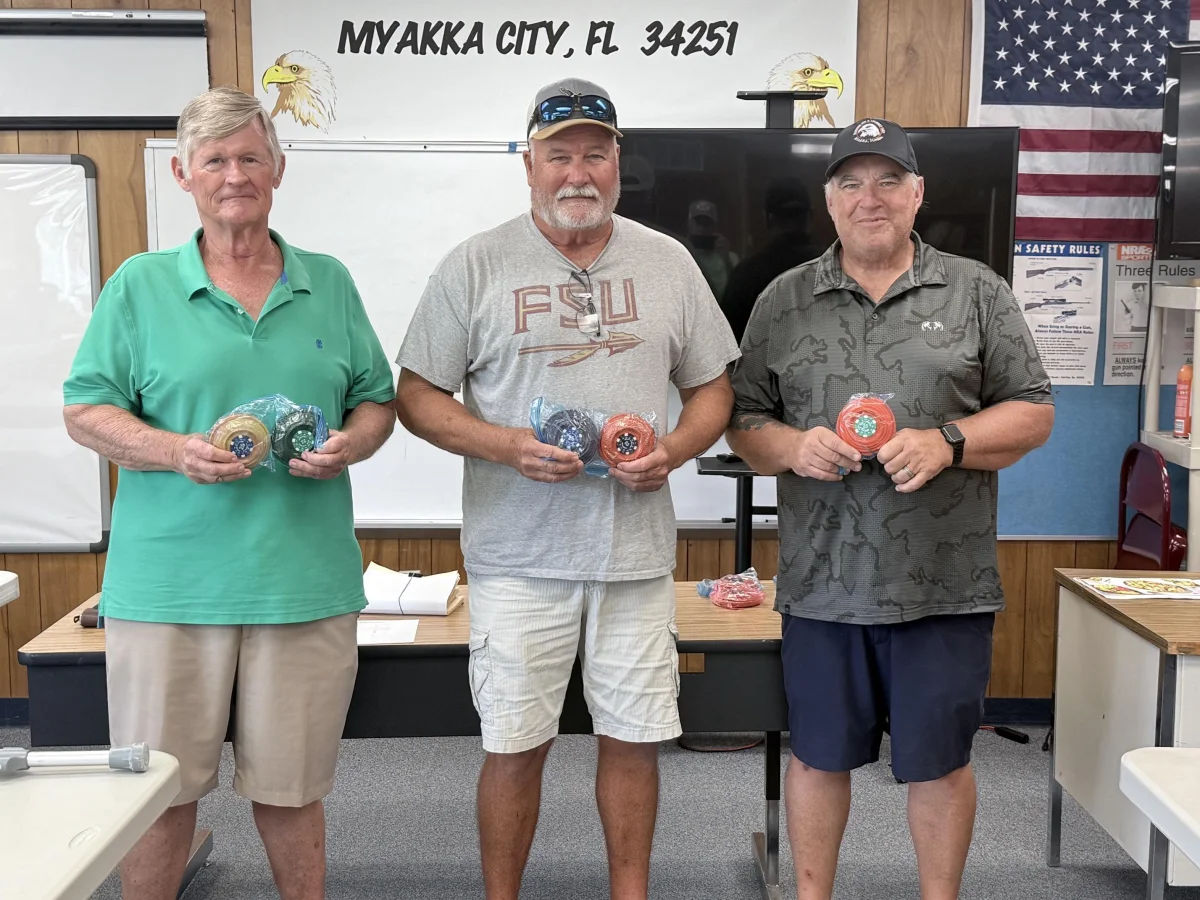
Photos of our Summer Challenge 2026 Winners below:

Ladies Open: 1st Place Mariah & 2nd Place Tia Laure (missing).
Men’s Novice: 1st Place Tony, 2nd Place Don & 3rd Place Warren.
Men’s Mid-Open: 1st Place Rob.
Men’s Open: 1st Place Bert, 2nd Place Tie John & Ed (took the photo) & 3rd Place Joe.

Shooters that shot 25 out of 25 clays in a round: Bert - Green & White, John - Green & White & Ed - White.

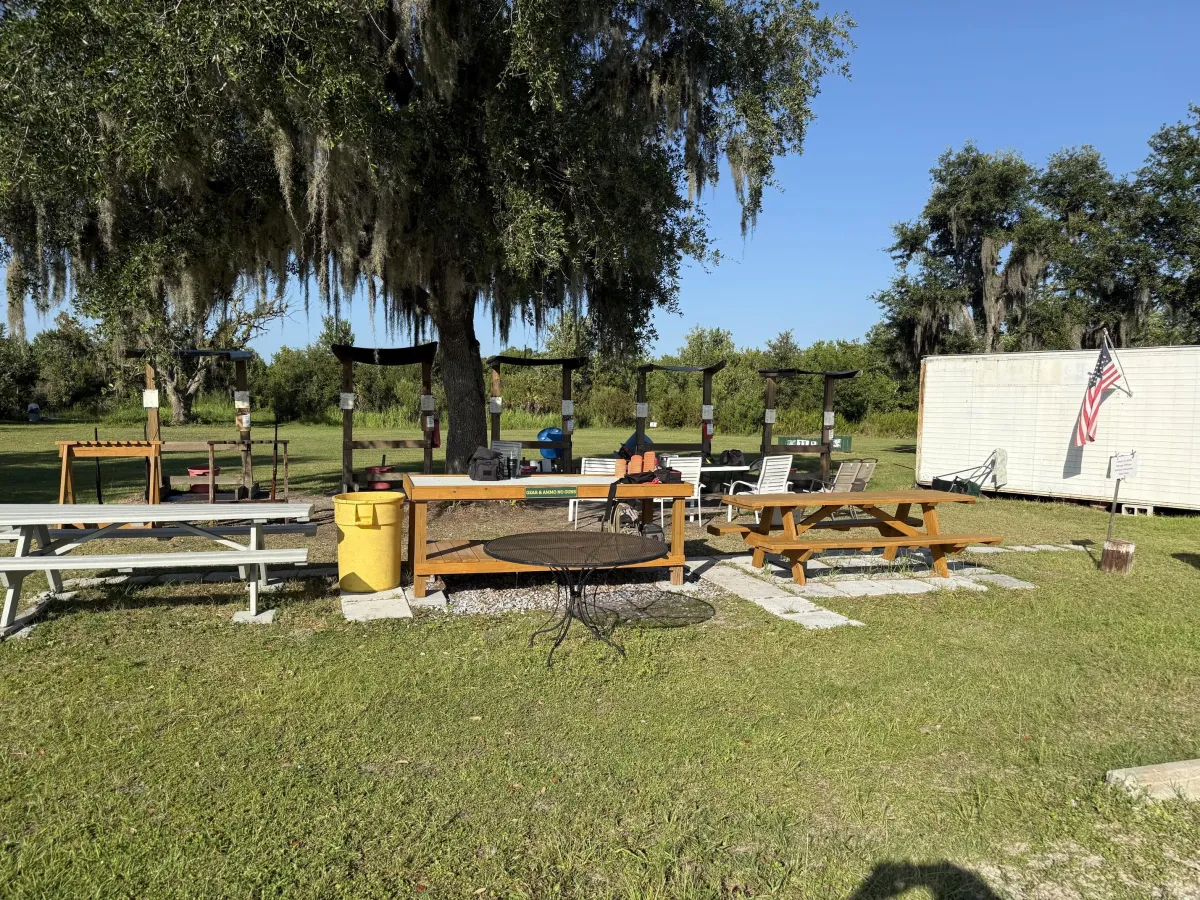
Five Stand range
Five Stand shooting
Five Stand shooting
Shooting range photo
Outdoor shooting facility
Five Stand shooting
Five Stand shooting
Five Stand range
Shooting match
Five Stand range
Archery range

5 Stand 2026 Summer Challenge (Past example)

Shooting range

Want to host an event at MGAC?

We would love to hear from you & see how we can make that happen.

Give us a call at (941) 322-0055 or send us an email at [email protected]

Shotgun Sports at MGAC

5-STAND

Fast targets. Five stations. One unforgettable round.

25 targets13 trapsAll skill levels

Fall 2026 & Early Winter 2026–27

5-Stand Double Shoot Competition

Two events. Six courses of fire. Join MGAC for a clay shooting competition that challenges experienced shooters and gives newer shooters an engaging way to build confidence and sharpen their skills. Open to members and non-members.

Co-Chairs: Bert Zinkand & Ed Dawson

Part 1 · Fall · Alpha

October 16 – November 8, 2026

Registration opens: October 2, 2026

Courses: Green, Blue & Black

Friday, Saturday & Sunday, 9am–2pm. Twelve shooting days to submit your best two scorecards for each Alpha course.

Awards & lunch: November 15, 2026

Part 2 · Early Winter · Bravo

November 27 – December 20, 2026

Registration opens: November 15, 2026

Courses: White, Yellow & Red

Friday, Saturday & Sunday, 9am–2pm. Eleven shooting days to submit your best two scorecards for each Bravo course. Closed the second Saturday in December for 4H Youth use.

Awards & lunch: January 10, 2027

Five classes · $20 per class

You may sign up for more than one class.

  • Open (1): 12ga & 20ga — more than two years of shotgun shooting experience.
  • Open (2): 28ga to .410 bore — more than two years of shotgun shooting experience.
  • Mid-Open (3): 12ga & 20ga — two years or less of shotgun shooting experience.
  • Ladies (4): The same experience levels listed for the other classes apply.
  • Novice/Beginner (5): One year or less of shotgun shooting experience.

Register at the MGAC office

Provide your name, class selection, email address, phone number and $20 payment. MGAC membership is not required.

5-Stand tokens: $8.25 each for members; $10.75 each for non-members. Members and non-members who buy 10 tokens receive one additional free token.

Scoring & awards

For each part, turn in your best two 25-round scorecards for each of its three courses of fire. The highest score, closest to 150 hits, wins the class. First, second and third places are awarded in every class.

Have the RSO/Trapper sign your scorecards, then place them in the mailbox on the side of the white trailer at the 5-Stand range for Co-Chair pickup.

Platinum level: 25 out of 25 straight hits on all Alpha or all Bravo courses of fire for the Double Shoot.

Awards & lunch schedule

Applies to both November 15, 2026 and January 10, 2027.

  • 9am–11:45am: Free round shooting for all Double Shoot participants.
  • 11am: Classroom opens.
  • 12:15pm–1:15pm: Lunch and awards presentation.

Questions?

Call Matthew Dansbury, 5-Stand Committee Chair & MGAC Director, at (910) 624-4444.

Clay Target Shooting at MGAC

Fast-paced, friendly and challenging at every skill level.

Five-Stand combines the best elements of trap, skeet and sporting clays. Five shooters rotate through five stands, facing a changing mix of target presentations. A complete round includes 25 clay targets.

New shooters are welcome. Our RSOs and trappers will help you understand the course, stay safe and enjoy the experience.

Current Hours

September & October 2026:
Friday, Saturday & Sunday
9:00 AM – 2:00 PM

Closed the second Saturday of every month for 4-H youth use.

Hours also change for clinics, maintenance and committee meetings — the month-by-month schedule below is the one to check before you drive out.

$8.25Member round
$10.75Guest round
25Targets per round
7½, 8 or 9Permitted shot sizes

Days, Hours & Events

September & October 2026 at the 5-Stand.

Open Friday, Saturday and Sunday, 9:00 AM to 2:00 PM. Everything that differs from that pattern is listed below.

September

4 Sep – 27 Sep · 9 AM–2 PM

  • Fri – SunOpen, 9:00 AM – 2:00 PM
  • Thu 10 SepBasic Training Clinic, 9:30 AM – 12:30 PM. Five slots, 1 token, bring 2 boxes of shells.
  • Sat 12 SepClosed — 4-H youth use.
  • Thu 17 SepAdvanced Training Clinic, 9:30 AM – 12:30 PM. Five slots, 2 tokens, bring 3 boxes of shells.
  • Thu 24 SepNo 5-Stand committee meeting this month.

October

2 Oct – 1 Nov · 9 AM–2 PM

  • Fri – SunOpen, 9:00 AM – 2:00 PM
  • Thu 8 OctBasic Training Clinic, 9:30 AM – 12:30 PM. Five slots, 1 token, bring 2 boxes of shells.
  • Sat 10 OctClosed — 4-H youth use.
  • Thu 15 OctAdvanced Training Clinic, 9:30 AM – 12:30 PM. Five slots, 2 tokens, bring 3 boxes of shells.
  • Fri 16 OctDouble Shoot Part 1 begins. Open 9:00 AM – 2:00 PM.
  • Thu 22 OctClosed — 5-Stand committee meeting, 9:30 AM to noon.

Clinic sign-up: five slots per clinic, first come first served. Sign up at the MGAC office with Wendy. Basic clinics run the second Thursday of the month, Advanced the third.

RSOs and trappers: two trappers and one RSO are required whenever the 5-Stand is open. Sign up for the days you can cover under 5-Stand Trap Puller on the Volunteer page — and if your plans change, find a replacement and let the Club Operations Manager know.

Six Courses of Fire

Choose the challenge that fits you.

MGAC's 5-Stand uses 13 traps to create trap, battue, quartering, crossing and rabbit presentations. Every course includes singles, report pairs and true pairs.

Novice

Green & White

Approachable target presentations designed for developing confidence, rhythm and fundamentals.

Intermediate

Blue & Yellow

More variety, speed and angles for shooters ready to sharpen timing and target reading.

Advanced

Black & Red

Our most demanding combinations for experienced shooters seeking a serious challenge.

Training

Basic & Advanced Clinics

Shotgun 5-Stand clinics run the second and third Thursdays of every month, 9:30 AM to 12:30 PM. Basic costs one token and takes two boxes of shells; Advanced costs two tokens and takes three.

Five slots per clinic. Sign up at the MGAC office with Wendy, or call the range at 941-322-0055.

Competition & Community

Fall & Winter Leagues

Fall League: Friday 16 October through Sunday 8 November 2026, with the Awards Lunch on Sunday 15 November. View Double Shoot classes, registration and scoring above.

Winter League: 16 January through 7 March 2027. Details follow in December.

Leagues are an easy way to sharpen your shooting and meet the rest of the clay-target crowd — new shooters are welcome in both.

Clay Shooting Library

Break More Clays

A growing collection of practical 5-Stand lessons. Open a tip below; opening another closes the one before it.

Tip #28Your Secret Weapon: Shotgun Spreader Loads

Your Secret Weapon: Shotgun Spreader Loads

Shotgun shell spreader loads are designed to increase the spread of shot pellets when fired from a shotgun, making them ideal for sporting clays or for hunting game birds. These specialty loads are popular among shooters for their ability to cover a wider area with each shot. In this article, we will explore the basics of shotgun shell spreader loads and provide tips for choosing the right one for your shooting needs.

Understanding Shotgun Shell Spreader Loads

Shotgun shell spreader loads contain a specialized shot column that is designed to open up quickly after leaving the barrel of the shotgun. This rapid spread of shot pellets increases the chances of hitting multiple targets at once or increasing the likelihood of hitting a moving target. The spread pattern of these loads can vary depending on the manufacturer and the specific design of the shell, so it is important to test different spreader loads to find the one that works best for your shooting style.

An improved cylinder or tighter choke will deliver an effective pattern out to 35 yards. With cylinder or skeet chokes, 25 yards is generally the maximum range for a pattern with killing power.

In addition to their wide spread pattern, shotgun shell spreader loads are also designed to deliver consistent and reliable performance. These loads are typically made with high-quality shot pellets and wads to ensure optimal performance and accuracy. Some spreader loads may also feature specialized designs, such as a shot cup or buffer material, to help control the spread pattern and improve overall performance. Overall, shotgun shell spreader loads are a reliable and effective option for shooters looking to increase their chances of hitting their target.

Tips for Choosing the Right Spreader Load

When choosing a shotgun shell spreader load, it is important to consider the intended use of the load. For example, if you are hunting game birds in dense cover, you may want to choose a spreader load with a wide spread pattern to increase your chances of hitting a moving target. On the other hand, if you are shooting at multiple targets in a sport shooting competition, you may want to choose a spreader load with a tighter spread pattern for increased accuracy.

Make sure to test different spreader loads at the shooting range to determine which one offers the best performance and accuracy for your shooting needs. By considering these factors and testing different spreader loads, you can find the right option for your shotgun and shooting style.

The above was taken from a Shotgun Life article written by their staff.

Tip #27Dealing with Accelerating Droppers

Dealing with Accelerating Droppers

The best way to deal with accelerating droppers is to learn to bow to the target. What do I mean by this? Quite simply, with any fast-rising target like teal or any driven target off a tower, we must produce a smooth, assertive swing through the target. To do this effectively, the hips must push forward and the upper torso must tilt back. Weight is transferred from the front foot to the rear foot. The opposite is true with any dropping target, and the shooter must insert his muzzles under the target and bend forward slightly from the waist, allowing his weight to shift smoothly onto his leading leg (left foot for a right-hander). This forward bend from the waist is extremely important because if the shooter attempts to move the gun on the target line with his arms only, he will usually pull the gun away from his face, causing the gun to shoot high. The bowing motion will ensure that the shooter keeps his head down and “stays in the gun” as he triggers the shot. If you come out of the gun and lift your face off the stock by even a small amount, for example, ¼ inch at the gun end, then you will shoot two or three feet at thirty yards – even more at extended ranges. Shooting this high isn’t much use on a dropping target that might need the shot pattern to go six feet underneath at forty yards to ensure successful interception. The bowing motion will also reduce the tendency to stop or slow the gun and help to produce a progressively accelerating gun movement.

This tip came from the book “Successful Shotgunning” by Peter Blakeley.

Tip #26Why I Use Swing-Through

Why I Use Swing-Through

By George Digweed. Clay Target Nation, August 2024, pages 42–46.

The King of Clays explains why he really does use the swing-through technique almost exclusively.

Ever since I’ve started shooting clay targets, I’ve shot swing-through — starting behind the target and pulling the trigger as or soon after you pass through it. I’ve never advocated another method, nor used one, but people who I’ve never met insist that I don’t shoot that way.

For years, I’ve let my results do the talking, but by writing this article I want to put the rumor to rest for good and explain why I use swing-through and am firmly convinced that it is the most efficient way to shoot. You may not choose to do things my way, but perhaps you’ll understand why my method has worked so well for me over the past 40-plus years.

If you look at it logically, there are four places you can miss a target: above, below, in front, and behind. By coming through the bird, I’ve got its line well determined and eliminated the chances that I will miss high or low. In essence, I’ve cut down the ways I can miss the target by 50%, and to my mind, that makes the shot a lot easier.

Let’s say I’m coming through the bird from behind and the target goes up in the air. I can move right along with it. If it dips in the wind, I can go with it. But if I’m starting out in front of the target as you would in pull-away or maintained, I’m in a bit of a pickle. I’m swinging, but I’ve lost the target line.

Please understand, I’m not in any way, shape, or form knocking pull-away, maintained lead, or any other method. They all have their place, and all of them have some great champions who plump for them as being the best way of shooting. But I believe that my method of swing-through, rightly or wrongly, is the most efficient method of doing what I want to get done. And if you’re that confident in something, why change it?

What most people don’t understand is that my method differs from what most people think of as swing-through. In most books on wingshooting, you’re taught to swing quickly through the target and pull the trigger just as you pass it, and the inertia of your swing automatically generates the proper lead. That method works, particularly if you’re hunting, but it relies on good reflexes and timing. I don’t think it’s especially consistent. If you use that method in competition, you had better be on song or you’ll struggle.

I’m not a believer in ripping through the bird. I move fast enough to get in front of it, but then I use my eyes and hands to finish the shot as it approaches the break point. Sometimes I’m accelerating the gun as I pull the trigger, but it’s more likely that I’m matching the speed of the target or letting my eyes finish the shot.

That’s probably why some people who have watched me shoot think that I’m not swinging through every target. If they see only the last few moments of my shot, you might think I’m shooting maintained lead or even diminishing lead. Trust me, I’m not. I’m coming from behind the bird almost all the time. If my gun slows down, it’s because I’ve locked onto the target with hard focus and I’m moving with it.

This was driven home when I recently worked with my friend Anthony I. Matarese Jr. on a series of shooting videos. Anthony’s well known as a pull-away shooter, though he does use other methods. We set up gun cameras and laser trackers, and we learned that at the end of the shot, our methods really aren’t so different. We use our eyes and hands to sync up with the target and fire when our subconscious tells us that the lead feels right.

The difference is how we get in front of the bird. Anthony’s likely to mount his gun on or slightly in front of the target, and I start behind it. Anthony plans where he’s going to insert his gun relative to the target, and I do not — I’m coming from behind.

Once we get out in front, though, we do virtually the same thing. A bit of history can help us explain the difference.

When Anthony was coming along 25 years ago, he was taught that the target never should get in front of the barrel. There’s a certain amount of sense to that: The gun must get out front, so why not start there? In addition, he was warned that starting behind the target would make it extremely difficult to control. That may be true if you’re shooting “traditional” swing-through, but not if you do it my way.

Remember, too, that many of your early top shooters in the U.S. came from a skeet background. Skeet is mostly a maintained-lead game, particularly at the international level, so those shooters logically brought that technique with them when they switched to sporting.

I never had a shooting coach, so I learned to shoot by watching the best shooters in England. A.J. “Smoker” Smith, Brian Hebditch, Barry Simpson and Duncan Lawton all started on the back of the bird and moved through it, so I emulated them. I even found that coming from behind worked a treat in skeet, and ever since I’ve shot 95% of my targets using my method of swing-through.

What constitutes the other 5%? On a true pair of outgoing targets as you might see in double trap, I take the first bird quickly – almost a spot shot. On the second bird I’ll move over and swing up to the bird and through it as I normally would.

If I’m forced to take a teal target on the drop, I’ll usually use a maintained lead or a slight pull-away, as it would be nearly impossible to get a line by inserting above a falling bird. I have to see the bird, so I mount beneath it. I’ll also take a teal or crow at the very top, getting hard focus on the bird just as it reaches its peak and almost rifle shooting it.

The final scenario where I don’t swing through is a flat, fast chandelle. Those targets are cutting through the air, and it is difficult to generate enough lead and keep control of your swing while coming from behind. In that case I use what I call an “invisible box” — the target enters at the top corner of the box and I shoot it at the opposite bottom corner with a slight maintained lead. It’s almost as if the target is falling into my shot string.

Above all, I’m looking for smoothness in my move to the target, and that begins with proper foot position and setup. I’ll save the particulars on that for another article, but for now, let’s just say that I want to be relaxed and comfortable at my break point, even if that means being slightly uncomfortable as I call for the bird. I want my body to rotate smoothly as I mount the gun and come up behind the bird.

Unlike move-mount-shoot and other methods that put an emphasis on a perfect, repetitive gun mount, my method is a touch more forgiving. Say you use too much back hand to mount your gun (a fault of my own, but that’s another story). If you come from the back of the target and move through the front, you’re on the line and that less-than-stellar mount doesn’t really matter much.

I want to start looking hard at the bird just before I pass through its back edge. I’ll hold that hard focus for as long as necessary to feel as if I’m in control of the bird, then I fire. Sometimes that is just as I pass through — particularly on quartering shots — but on long crossers, I may well run with the bird a little bit.

So that’s how I do it, and why. I know some of you might be thinking that I can do this because I have some superhuman abilities. Let me assure you, I do not. I simply believe that this is the most efficient way of shooting, and I am not about to change now.

I’m not going to advocate that you should switch to my way if you have another base method that works for you. Rather, I’d like you to think about this as another approach that might help you on some specific targets that bedevil you — say, a quartering target or a rabbit. If your base method isn’t working, try this and see what you think.

Nor should you be afraid of shooting this way if you’re just starting out in the game. I don’t teach clay target shooting very often, but I do a lot of tuition for game shooting. I frequently work with people who have been coached in maintained-lead or pull-away, and they basically know how far they need to be in front of a target to hit it. Yet they have no idea of how to naturally establish a relationship between their eyes, the target and their natural speed. Our high pheasants and fast partridges flummox those people regularly.

So I coach them on starting behind the bird and moving through it. Normally, within two lessons, they’ve had that “light bulb” moment and they’re starting to take their birds in grand style. I almost never ask them where they missed the bird or tell them where they missed. Even so, within two lessons, they’re telling me exactly where they’ve missed the bird.

By that point, they’re understanding the correlation between inserting behind, focusing on the target, coming through the target to get to the leading edge, and pulling the trigger while keeping the gun going. They know if they’ve missed behind, and they know if they’ve come off the line, and they get back on song without much help from me.

And I never talk about lead. Instead, it’s focus, feel and being smooth — and that’s important no matter how you shoot.

Adapted from 28-time world champion George Digweed’s videos at claytargetinstruction.com.

Tip #25Angles, pressure and flinching

Three practical lessons can sharpen your next round: read the target presentation, manage pressure one shot at a time and address a persistent flinch early.

  • Read the angleA target needs more lead as its crossing angle, speed or distance increases. Landmark the full flight path and study what it is doing in the kill zone.
  • Control your breathingSlow, rhythmic breaths can lower your heart rate and settle your body when competition pressure builds.
  • Use constructive self-talkReplace doubt with simple reminders such as “I have practiced for this” and “I am prepared.”
  • Shoot the next targetBreak the round into stations and individual shots instead of carrying the weight of the entire competition.
  • Take a flinch seriouslyRecoil anticipation may be linked to gun fit, mount, heavy loads, years of shooting or physical concerns. A qualified coach can help identify the cause and a practical correction.

Takeaway: Read the presentation, stay anchored in the current shot and seek knowledgeable help if recoil anticipation begins disrupting your move or trigger pull.

Adapted from “Break More Clays – Tips #25,” featuring guidance from Bill Elliott, Haylyn Hanks and Stuart Brown.

Tip #24How to visually focus on a clay target

Strong visual focus starts before the call. Read the target’s launch angle and speed, then let your eyes track its flight smoothly.

  • Keep both eyes openUse binocular vision for better depth perception and a wider field of view.
  • Track smoothlyFollow the target with steady, fluid eye movement instead of jumping ahead or checking the gun.
  • Pre-visualize the flightMentally rehearse the target’s path and the eye movement needed before it launches.
  • Train visual transitionsPractice near-to-far focus, peripheral movement detection and quick target recognition.
  • Stay target-focusedResist fixating on the sight or barrel; maintain visual contact with the clay.
  • Trust your position and trainingUse a balanced stance, move freely and avoid disrupting your rhythm by overthinking.

Takeaway: Relaxed eyes, fluid tracking and a stable stance make fast targets easier to acquire and follow.

Adapted from “How to Visually Focus on a Clay Target,” Shotgun Life, November 2024.

Tip #23Build a consistent post-shot routine

A reliable post-shot routine helps you reset physically and mentally, so every target begins with the same focus.

  • Physical resetOpen the shotgun, lower it consistently, relax your shoulders and control your breathing.
  • Mental releaseAcknowledge the hit or miss without judgment, then let it go.
  • Read conditionsRefocus on the next station, target presentation and current range conditions.
  • Begin againMove directly into your normal pre-shot routine.

Takeaway: Consistency prevents tension, keeps one miss from affecting the next target and reduces overconfidence after a hit.

Adapted from “The Importance of Post Shot Routine Clays Shooting,” Shotgun Life, January 2026.

Tip #22The Importance of Proper Foot Position

The Importance of Proper Foot Position in Wing & Clays Shooting

Foot position is an integral part of the shooting process. This is because your feet act as the foundation for your entire body, providing balance and stability during the action. The correct foot position can help you absorb gun recoil and align your body towards the target, greatly enhancing your accuracy and performance. Generally, your lead foot (the one closest to the target) should be slightly ahead of your rear foot, with your weight mostly on your front foot.

The foot position can also influence the body’s ability to rotate smoothly, which is essential in clays shooting. More specifically, when shooting at moving targets, your feet must be positioned in a way that allows your upper body to pivot easily. This is due to the fact that, unlike in stationary target shooting, moving targets necessitate a wider range of motion. Therefore, the foot position should foster both stability and fluidity.

Your foot position can impact the speed at which a shooter responds to a target. A well-balanced and correctly oriented stance enables quicker movements and transitions between targets. This is particularly important in scenarios where targets appear rapidly or unexpectedly, forcing the shooter to adjust swiftly.

A correct and stable stance helps maintain balance and control, which are crucial in aligning the gun barrel with your line of sight, thus aiding accurate shooting. It also assists in the execution of a smooth and controlled swing, which is essential when chasing moving targets.

Moreover, foot position directly affects gun mounting. A proper stance allows the gun to be brought up to the cheek and shoulder smoothly, ensuring a consistent and accurate aim. Sudden body movements, often a result of improper foot position, can cause a misalignment between the shooter’s eye and the gun sight, leading to inaccurate shooting.

The proper stance, which includes a proper foot position, can also help manage the gun’s recoil. By distributing the recoil’s impact throughout the body, a shooter can maintain his or her aim and rapidly ready for the next shot. It’s clear, therefore, that an accurate shot doesn’t only depend on the shooter’s eye and hand coordination but also on the stability provided by the foot position.

In terms of speed, a correct stance facilitates faster target acquisition and gun movement. This is especially beneficial in clays shooting where targets can appear and disappear rapidly. The ability to quickly position your feet and align your body can make the difference between a hit or a miss.

Foot position also influences maneuverability. The capability to pivot and rotate smoothly, enabled by a well-aligned stance, permits seamless transitions between targets. As a result, the shooter can effectively engage multiple or moving targets, thereby enhancing performance.

For endurance, a relaxed and balanced stance reduces the strain on the body, enabling the shooter to maintain optimal performance over extended periods. Overly rigid or unnatural stances can lead to fatigue, affecting both accuracy and speed. Therefore, a proper foot position contributes to sustained efficiency and comfort during shooting sessions.

When it comes to foot position in shooting, certain common errors can negatively impact the shooter’s performance. One such mistake is positioning the feet too close together or too far apart. A too narrow stance compromises balance and stability, whereas a too wide stance impedes body rotation and mobility.

Another common error is improper weight distribution. Leaning too far forward or backward can affect stability and control, leading to inaccurate shooting. Ideally, the weight should slightly favor the lead foot, maintaining a forward-leaning posture that can absorb the gun’s recoil effectively. The lead foot should generally point towards the target, allowing the body to be ideally positioned for an accurate shot.

Remember, every successful shot begins from the ground up.

Tip #21Incoming Droppers, Trap Teal & Target Focus

Incoming Droppers

On the subject of incoming droppers, it is worth pointing out that when the clay loses its forward momentum it will normally show a tendency to curl as well as drop. This additional drift is caused by the spin imparted to the target by the trap arm. Fight any inclination to counteract the clay’s ponderous progress with an equally slow gun mount; force yourself to push your weight over the front foot to minimize the chances of your head lifting off the stock and mount the gun positively to the target when it moves into the area where you plan to break it.

This tip came from the book “A Champion’s Guide to Sporting Clays” by John Bidwell with Robin Scott.

Trap Teal Targets

The trap teal target on the way up is most often taken with a pass-through method with an almost pre-mounted and canted gun. On the way up, muzzle speed is critical and is dependent on the speed and distance of the target. Because you are pulling the trigger as the barrel passes through the target, this target requires a great deal of practice to hit it consistently.

This tip came from the book “Shotgunning in the Automatic” by Warren Watson and Mike Wilfley.

Look Small Miss Small

On a slow-developing teal where you wish to break the target “at the top” or close to it, it is often useful to focus on the bottom edge. Remember, the eyes lead the hands. We tend to shoot where we look, so it helps to focus at a specific, critical point on the target, rather than looking at the entire target. “Look small, miss small.”

This tip came from the book “Shotgunning in the Automatic” by Warren Watson and Mike Wilfley

Tip #20Effective Range & Efficiency of Choke Constrictions

Effective Range and Efficiency of Choke Constrictions

The effective range of a shotgun choke is not a fixed distance where it suddenly stops working. Instead, a choke determines how tightly the shot pattern holds together, which affects the maximum distance at which you can reliably place enough pellets on the target for a clean kill or a broken clay.

The table below assumes modern target or hunting loads with lead shot and a well-patterned shotgun.

ChokeTypical Constriction (12 ga.)Approximate Pattern at 40 YardsEffective Range
Cylinder (CYL)0.000″40%20–25 yards
Skeet (SK)0.005″45%20–25 yards
Improved Cylinder (IC)0.010″50%25–35 yards
Light Modified (LM)0.015″55%30–40 yards
Modified (M)0.020″60%35–45 yards
Improved Modified (IM)0.025″65%40–50 yards
Full (F)0.030″70%45–60 yards
Extra Full/Turkey0.035–0.045″+75–90%50–70+ yards (turkey-specific loads)

Practical Applications

  • Cylinder: Home defense, upland birds over pointing dogs, very close sporting clays.
  • Skeet: Skeet shooting, quail, woodcock, rabbits.
  • Improved Cylinder: The most versatile choke for upland hunting and many sporting clays stations.
  • Light Modified: An excellent “do-everything” choke, particularly popular for sporting clays.
  • Modified: Pheasants, ducks over decoys, trap singles.
  • Improved Modified: Long crossers, late-season pheasants, handicap trap.
  • Full: Long-range waterfowl (with appropriate non-toxic choke), turkey, trap handicap.
  • Extra Full/Turkey: Specialized for turkey hunting with dense, high-performance loads.

How Pattern Diameter Changes

A rough guide to pattern diameter is:

ChokePattern Diameter at 20 yd30 yd40 yd
Cylinder20–22″30–34″40–44″
IC18–20″27–30″34–38″
LM16–18″24–27″30–34″
Modified15–17″22–25″28–32″
IM13–15″20–23″24–28″
Full11–13″18–21″20–24″

Important Considerations

The choke is only one part of the equation. Pattern performance is also affected by:

  • Shot size (larger pellets retain energy better).
  • Payload weight (more pellets generally produce denser patterns).
  • Velocity (high velocity can sometimes degrade patterns).
  • Wad design (modern wad technology can significantly tighten patterns).
  • Shot material (steel, bismuth, tungsten, and lead behave differently).
  • Your individual shotgun (two shotguns with identical choke markings can produce noticeably different patterns). Be sure to pattern your shotgun!

The Bottom Line

For most sporting purposes:

  • 0–25 yards: Cylinder or Skeet
  • 25–35 yards: Improved Cylinder
  • 30–40 yards: Light Modified
  • 35–45 yards: Modified
  • 40–50 yards: Improved Modified
  • 45–60 yards: Full

Many experienced sporting clays shooters today consider Light Modified (0.015″) the most versatile choke because it provides forgiving patterns at close range while maintaining enough density for targets out to about 40-45 yards. For hunters, Improved Cylinder and Modified remain the two most versatile choices, covering the majority of upland and waterfowl situations.

Tip #19Mastering the Elusive Rabbit Clay Target

Mastering the Elusive Rabbit Clay Target

Among the various sporting clays targets, the rabbit clay target stands out as one of the most difficult to conquer. The rabbit target mimics the erratic movements of a fleeing rabbit, making it a true test of skill and marksmanship. Here, we will delve into the techniques and strategies that can help shooters master the elusive rabbit clay target.

Strategies to Conquer the Elusive Rabbit Clay Target

  • Study the Line: The key to mastering the rabbit target is in understanding its unpredictable path. Rabbit targets bounce and veer off in different directions, similar to a rabbit trying to evade a predator. Observing the rabbit’s movement during practice rounds is crucial. Pay attention to how it rolls, bounces, and changes direction. By deciphering its movements, you can anticipate its next move and adjust your aim accordingly.
  • Timing and Lead: Timing is everything in shooting the rabbit. It requires split-second decision-making and hand-eye coordination. To hit the rabbit, you must shoot slightly ahead of it. Think “shoot the front paws”. Achieving this comes with practice, as it varies depending on the speed and angle of the target. Start with a small lead and gradually increase it until you consistently hit the target. Developing muscle memory and honing your reflexes are the key to mastering this technique.
  • Follow-Through: Another critical aspect is the follow-through. After pulling the trigger, maintain your swing until you see the rabbit break. Neglecting the follow-through can result in missed opportunities and frustration.
Tip #18Pre-Shot Routine & Consistency

Pre-Shot Routine

The pre-shot routine is a vital tool used by all proficient athletes. Master it, and become a better shot and a better competitor. Do not change your routine during competition. Changing it would imply that all that you have trained for is valueless and that would be detrimental to your confidence and performance. Make your adjustments in practice and execute them with assurance and certainty during competition.

This tip came from “Shotgunning in the Automatic Mind” by Warren Watson and Mike Wilfley

Consistency Through Routine

One of the defining traits of top-level shooters is consistency, the ability to perform at a high level over time. Consistency is not the result of occasional brilliance but of habit, discipline, and routine.

Creating a pre-shot routine helps shooters:

  • Calm their nerves
  • Sharpen focus
  • Ensure technical accuracy

A winning mindset emphasizes the process over the outcome. Shooters who develop a reliable and repeatable process for every station reduce mental fatigue and increase accuracy. Whether it’s how they mount the gun, breathe before calling for the bird, or visually pick up the target, consistency in routine allows the brain to focus on execution rather than decision making under pressure. It is often said in shooting sports that “the game is won before you step into the stand.” This speaks to the value of preparation, both mental and physical. Shooters who approach every round with the same calm, focused routine are more likely to succeed in the long run.

by Haylyn Hanks

Hit the Skeet Range for Sporting Practice

Get on a skeet range. I have always believed the skeet field at the local club is one of the most underutilized areas to practice for sporting clays. In chatting with shotgun coach and multi-time National Sporting Clays Champion Brandon Powell, he noted, “Out of the 2 million rounds I have fired, close to half of them have taken place in practice on a skeet range.” Skeet teaches the importance of hold points, timing, angles of all sorts, and lead.

by Bill Elliott

Tip #17Crosser Mount, Focus & Commitment

Crosser Mount!

  • Start with a slightly unmounted gun if it’s a crossing shot.
  • Time your mount so that the muzzle inserts on the target as the stock arrives at your shoulder and face.
  • Move the gun at the same speed as the bird, maintaining the same gun/target relationship as the insertion.

This tip came from the book “Straight Shooting – A World Champion’s Guide to Shotgunning” by Anthony Matarese, Jr.

Focus and Let It Happen!

If you’re focused on the target as intently as you should be, you can just let the shot happen without conscious thought – and that helps you shoot as well as you can.

This tip came from the book “Straight Shooting – A World Champion’s Guide to Shotgunning” by Anthony Matarese.

Expectations and Commitment

Balancing commitment with expectations is another point of difficulty. Many intermediate shooters expect to shoot as well as their advanced counterparts without an increase in commitment. Commitment equals practice and lessons. Advanced shooters shoot twice weekly and take lessons quarterly.

This tip came from the book “Sporting Clays Consistency: You Gotta Be Out of Your Mind!” by Gil & Vicki Ash.

Tip #16Stay in the Gun, Focus & The Battue

Stay in the Gun!

After you pull the trigger, stay in the gun. Don’t take the gun away from your cheek until long after the target has broken. This is to prevent head-lifting and promote precision aim and control. If you don’t do this, your head will lift ever so slightly in anticipation of recoil. Soon, it becomes a habit. What happens is the head lifts right when you pull the trigger or just before. Most shooters have this problem and don’t even realize it. Feel the pressure at all times and stay buried in the gun until the target breaks or say good-bye to a good score. Staying in the gun complements precision shooting. This also helps reduce recoil-related flinches.

This tip came from the book “Precision Shooting” by James Russell.

Focus on the Clay

For all pairs, this is the first thing we tell our students. Most shooters have a strong tendency to push the gun immediately toward the second target after they hit the first. (They do this even though they don’t know exactly where the second target is!) This does two things: It makes them rush, and it pulls their eyes to the barrel of the gun. The barrel begins to control the eyes instead of the other way around. We cannot stress enough how much risk looking at the barrel introduces into your shot. Every success and every failure in clay sports is rooted in focus on the target. It is crucial to get your eyes on the front edge of that second bird.

This tip came from the book “If It Ain’t Broke, Fix It!” by Gil & Vicki Ash.

The Battue

The battue is unique not only in its flight path, which usually has a higher arc than the chondel, but also in its physical structure. It is thin, allowing the battue to slip through the air with little drag. It is faster than it appears at first. When it shows its face, it might seem closer than it really is. In this respect, it plays the same perception tricks as the chondel. When the battue starts to slow down, it turns from being on-edge to face-on, where it can be shot fairly easily.

A sustained lead method and the pull-away method are successful for dealing with battues. Open up your chokes, because when the battue opens, it is physically easy to break.

This tip came from the book “Shotgunning in the Automatic Mind” by Warren Watson and Mike Wilfley.

Tip #15Focus on the Clay & Sporting Clays Etiquette

Focus on the Clay

The most important thing is to keep your eyes on the bird when you pull the trigger. You should never be visually focused on the gun. The gun should move in one smooth motion from the ready position to shoulder to cheek. Take the shot without hesitation.

This tip came from the book “The Orvis Wingshooting Handbook – Proven Techniques for Better Shotgunning – New and Revised” by Bruce Bowlen.

Sporting Clays Etiquette Tips

  • Do be kind to beginners. We were all there at one time.
  • Do let other shooters “play through” on a sporting clays course. Particularly if you are practicing a troublesome shot and want more practice.
  • Do be ready to shoot when it is your turn. No one wants to wait while someone goes to get more ammo or a particular choke.
  • Do respect others while driving a cart. It breaks a shooter’s concentration if you pull up to a stand while they are trying to shoot.
  • Don’t give unsolicited advice to people you don’t know.
  • Don’t let your shells fly if you shoot a break open action gun. You could hit another shooter or ding someone’s gun. It’s easy to catch your empties and drop them into the bucket.

These tips came from “Straight Shooting” by Anthony Matarese.

Tip #14Footwork, Visual Pick Up Point & Moving Laterally

Footwork

Footwork is an important component for breaking clays at 5 stand. Ignore all the crouches, wide-legged stances, and other contortions you see among trap and skeet shooters. Just stand straight, with your feet five or six inches apart, your left foot (right foot if you’re left-handed) slightly forward and pointing to the spot where you’re going to kill the bird.

This tip came from the book “Shotguns and Shooting” by Michael McIntosh.

Visual Pick Up Point

Where you place your eyes to first pick up the target can be critical. This is called the visual pickup point. Both eyes softly focus on the visual pickup point, which is somewhere in front of the trap, along and slightly above the target line.

This tip came from the book “Shotgunning in the Automatic Mind – The Guide for Shotgunners and Instructors” by Warren Watson and Mike Wilfley.

Move Laterally First

When the target appears, the first move you make should be lateral. Yes, you will eventually have to get the gun up to your face, but a lot of shooters have the overwhelming tendency to bring the gun vertical to the target line first and then move laterally. When this happens, the bird closes quickly (occlusion), and the shooter ends up chasing, usually in a panic, to catch up.

This tip came from the book “Sporting Clays Consistency: You Gotta Be Out of Your Mind!” by Gil & Vicki Ash.

Tip #13The Rising Teal & Are You Ready?

The Rising Teal

The biggest mistake people make on the rising teal shot is that they insert the barrel with some space beneath the target. If that happens, you’ll tend to generate too much speed as the clay slows, and you’re going to blow right past it, or simply be out of sync. If you are out of sync, you cannot judge the true apex. You need to feel the target stop, not see it stop. Once you see it stop, it’s too late.

This tip came from the book “Straight Shooting – A World Champion’s Guide to Shotgunning” by Anthony Matarese, Jr.

Are You Ready?

I feel that the initial movement is essential to everyone’s shooting style. If a shooter is not physically and mentally ready to follow with the first movement of the target, like a sprinter waiting for the starter’s gun, he will be left at the blocks every time.

This tip came from the book “You and the Target” by Kay Ohye.

Tip #12The Flinch

Question: I’m a C-class shooter and shoot regularly. Periodically, I’ll flinch on a shot and have no idea why. While I can’t detect a pattern, it tends to happen more often on the first target of a pair. Do you know of any research on why we flinch, and do you have any suggestions on ways to eliminate it?

Answer: There is no mistaking a flinch — that momentary “hiccup” as you are about to pull the trigger of your shotgun. The most commonly held misconception is that a flinch is an anticipation of recoil caused by shooting heavy loads. It has been my experience that this is rarely the cause. Instead, it is caused by a sudden interruption of the acute visual connection between the target and the dominant eye. When this happens, your brain experiences a moment of visual confusion, causing the flinch. The cause of this visual disconnection is most often one of the following:

  1. Improper gun fit: For a shooter with a high cheekbone or smaller facial structure, the dominant eye may wind up below the rib of the shotgun when the shotgun is fully mounted and the shot is executed. With this shooter, a higher comb is the solution. Have an adjustable comb installed or use a comb riser product like the Beartooth Comb Riser.
  2. Spoiling the line: When the movement of your gun to the break point is such that the muzzle gets between your eye and the target, you inadvertently block your visual connection with the target as you execute the shot. This most often happens on targets that are descending at the break point. It also happens when a shooter is not committed to a break point and “rides the target.”
  3. Gun mount: I have often worked with shooters who press their head into the gun at the end of the move, even if their gun fit and movement to the target is perfect. This positions the eye below the rib and blocks the shooter’s visual connection with the target. Your best path to flinchless shooting is to seek the assistance of an experienced instructor who can diagnose and help you resolve your flinch.

Courtesy of Don Currie, NSCA’s Chief Instructor, an Orvis Wingshooting School instructor, and Master Class competitor.

Tip #11How to Break Clays Faster & Recoil Sensitivity

How to Break Clays Faster

There are many ways to learn to shoot the target faster. First, you should consciously attempt to shoot the target more quickly. Because some shooters have a hard time doing this on their own, ask an instructor to stand next to you and tell you when to shoot. You will absorb the timing and you no longer require the instructor to say when to shoot. Or, learn to shoot skeet. American skeet target speed is 45 mph and International Skeet target speed is 65 mph.

This tip came from the book “Break ’em All – The Complete Guide to Fixing Clay Target Shooting Problems” by B.J. McDaniel and Mark Taylor.

Recoil Sensitivity

Question: I am sensitive to recoil. I want to continue to shoot a 12 gauge and don’t want to switch to a smaller gauge. What do you suggest?

Answer: First, let’s understand the difference between “actual” recoil and “felt” recoil. The former is determined by physics. The latter is the shooter’s perception.

There are two ways to reduce actual recoil: 1) increase the weight of the gun, or 2) decrease the energy produced by the projectile. To decrease energy, you must reduce the weight of the projectile (the shot) or decrease the charge (gun powder). “Felt recoil” is the shooter’s perception of recoil. Reducing actual recoil also reduces felt recoil. There are a couple of things you can do to reduce felt recoil without increasing the weight of your gun or decreasing the energy of your shell.

While recoil reducers do not reduce actual recoil, they do reduce felt recoil by spreading out the impact of a gun’s recoil. Some of the most common recoil reducers on the market are the ISIS System by Recoil Systems, Gracoil by Graco and SoftTouch.

Another technique for reducing recoil is the lengthening of the forcing cones in the barrels of your gun. Much of the felt recoil from a shotgun is due to friction and pressure created in the five inches forward of the chambers. It is in this area of each barrel, called the forcing cone, where the wad and shot are forced to transition from the wider diameter of the chamber to the narrower diameter of the barrel. Forcing cones that have a steeper transition will produce greater recoil. Barrels with a more gradual transition will produce less felt recoil.

Finally, there is barrel porting. I am not a proponent of porting, as it involves putting holes in perfectly good barrels and is not as effective as lengthening of forcing cones or the use of a recoil system at reducing felt recoil.

Courtesy of Don Currie, NSCA’s Chief Instructor, an Orvis Wingshooting School instructor, and Master Class competitor.

Tip #10Stock Alignment & Finding the Right Hold Point

Stock Alignment

The stock must align the head so the barrel of the gun and an imaginary straight line from the center of the eye to the target are consistent. Fit of the stock should be such that you see the target with the shotgun in front of you exactly as you would see the target if you had nothing in front of your face.

This tip came from the book “Finding the Extra Target – The Ultimate Training Guide for All the Clay Target Sports” by John Linn and Stephen Blumenthal.

Finding the Right Hold Point

Question: What is the right hold point for crossing targets?

Answer: It depends. A hold point that is two-thirds of the way back from the break point toward the trap is a good start for a flat-trajectory crossing target. The speed, distance and engagement window of a target and pair may, however, require that you adjust your hold point closer to the breakpoint. Use your outstretched front hand to test your plan and see if a hold point adjustment is necessary.

With that said, and very generally speaking, you will need a bit less “runway” to execute a sustained-lead move on a crossing target, and thus can usually move your hold point closer to the break point. When using pull-away on a crossing target, the two-thirds rule is still applicable; however, you may find that a hold point that is halfway back from the break point is adequate when using sustained lead. With sustained lead, you are inserting to the lead and executing the shot. With pull-away, you must first insert to the target then separate from the target prior to executing the shot. Shooters tend to ignore a target’s transition point when selecting the break point and engagement technique. Almost all targets will transition, or change speed and direction, at some point along the flight path as the target succumbs to gravity. If the target is transitioning at the chosen break point, it is much more likely that you will occlude the target with the barrel and miss high and in front; particularly if using pull-away. This is why I advocate that a shooter possesses a handful of techniques to draw from and select the technique and hold point that is appropriate for each target.

Don Currie is NSCA’s Chief Instructor, an Orvis Wingshooting School instructor.

Tip #9Look at the Trap & What’s the Best Load?

Look at the Trap

It helps if you try to look at the traps before you shoot a station. If the trap is tilted, you’ll get an idea of how the targets will curl in flight. Look at the target boxes to determine the clays’ size – that should help you analyze distance and the rate at which those targets are going to slow down.

This tip came from the book “Straight Shooting – A World Champion’s Guide to Shotgunning” by Anthony Matarese, Jr. with Kerry Luft.

What’s the best load?

The “best load” is a matter of functionality and preference. Many semi-automatics will not operate properly unless you use a shell with enough energy to reliably activate the action. This varies from gun to gun, but I recommend a speed of 1,250 feet per second (fps) or greater when shooting a semi. For an over-and-under, I recommend any shell between 1,200 and 1,300 fps, or lighter if you are recoil sensitive. As for shot size, a larger shot, say 7 1/2, will enable you to better engage rabbits and targets that are edge-on or at longer distances. Smaller shot, such as 8 1/2 or 9, will disperse more quickly after leaving the muzzle and is more effective on closer range targets or belly/face presentations. In terms of load, some believe more is better. Theoretically, I guess that’s true, however, the greater the payload, the more powder you need to achieve the same speed. With more powder and more shot comes more recoil. I personally like a 1-ounce, 7 1/2, 1,260 fps shell. It’s a good compromise and I don’t have to change shells when shooting FITASC. When competing, I also carry a 8 1/2, 1-ounce B&P shell for short-range targets and those with more belly or face.

Don Currie is NSCA’s Chief Instructor, an Orvis Wingshooting School instructor, and Master Class competitor.

Tip #8The Last Few Clays

Congratulations! You have made it. You’re breaking clays in the high teens to low twenties. You are probably asking “So how do I get the last few clays?” Here are some key tips:

Have a Plan and Work the Plan. Know what the target is going to do. Know your break point, hold point and pickup point BEFORE you load your gun for the shot. Then, trust your plan and execute. Consistency is key.

Practice. Practice. Practice. The only way to get consistency is to practice. There are only 6 basic shots in 5 stand. A crosser, an incoming, an outgoing, a teal, a rabbit, and a quartering shot. Course setters play with the speed, curl, height to try to fool you. But, if a trapper says “you have a quartering out target from your left,” you should instantly have a picture of that type of shot in your mind. If not, practice some more.

The Mental Game. If you watch the best shooters, they all do one thing in common. When they shoot, they only have their plan and the clay in their mind. Everything else is tuned out. If they had a fight with their spouses, it is tuned out. If someone is talking in the background, it is tuned out. Focus on the clay is everything. Shooting from their subconscious is everything. They know what they are going to do. They have visualized it. Then, they let their subconscious go to work. They call for the bird. BANG. Nothing but dust.

Your Subconscious. Your subconscious is brain muscle memory. This is why practice is so important. You have hit the target before and now you are asking your brain to repeat the shot.

Get in the Zone. So how do you get into your subconscious before the shot? With a consistent pre-shot routine. First, relax and forget about everything else. Get into a comfortable stance for the first break point. Second, while loading your gun, visualize each clay at their break point. Third, move to your first hold point while visualizing the path of the bird. Fourth, cut your eyes to the pick-up point. Fifth, widen your eyes to let the light in and call for the bird. Result. Nothing but Dust.

Reference Materials

  • “Straight Shooting,” Anthony Matarese Jr.
  • “Shotgunning in the Automatic Mind – The Guide for Shotgunners and Instructors,” Watson and Wilfley
  • “60 Seconds with Vicki and Gil Ash”
  • “Breaking Clays – Target Tactics, Tips & Techniques,” Chris Batha
  • Don Currie, NSCA’s Chief Instructor
Tip #7Visual Pick Up Point & Choosing a Shooting Vest

Visual Pick Up Point

If your Visual Pick Up point is too close to the trap, your barrel movement will be erratic from shot to shot. You will have a feeling of always trying to catch up to the target. When this happens, you do not have a well-defined focus on the leading edge of the target. This causes both your hits and misses to be erratic. Solution: Move your eyes a little further away from the trap to give your eyes more time to pick up. Then, focus on the target’s leading edge, pull through it and fire. Your hits will be more consistent and turn the targets to dust.

What should I look for in a shooting vest?

First is fit. Not only must your vest look good, but it also must provide you with unrestricted movement. Test your vest on crossing targets, overhead/tower targets, and targets below your feet. A vest that fits well length-wise will also tend to have the front pockets at the correct height. A roomy vest with a drawstring comes in handy when adding winter clothes as under-layers. This adjustability also comes in handy immediately following overindulgences at Thanksgiving and Christmas.

Second is function. What characteristics do you want in your vest? If you live in the South, as I do, you might want to think about a mesh vest. Mesh panels will allow the vest to breathe as you are working up a sweat. The number and placement of pockets is also a factor. If you carry more than one type of shell when you shoot, you might want to think about split pockets: two sections in each of your two front pockets. If you reload, you might want to buy a vest with a back pocket to slip your empties into. I also like a breast pocket where I can store a lens cloth for my shooting glasses.

Third, there is the material and positioning of the gun mount pad. I strongly prefer a leather or imitation leather pad versus a cloth or suede gun mount pad. This helps to avoid getting your gun butt caught on your vest during the mount. If you mount more to the outside of the shoulder, you may want a wider pad than the standard.

Lastly, durability of the vest is important. The gun mount pad as well as the upper areas of the front pockets are high-friction areas and are most likely to wear out first. If you are “dimensionally challenged,” you might want to consider a custom vest from BEST (Ballistic Equipment & Sports Technology) or Shoot the Moon.

By Don Currie, Chief Instructor of the National Sporting Clays Association.

Tip #6Foot Placement

Once you know where you are going to break the target, it is time to address the field from the stand. It is important to put your feet in the correct position in relation to the breakpoint so you will be in balance with it. Point your left foot (right foot for lefties) just to the right of the breakpoint you have picked. The other foot should never be parallel to the front foot, but should be placed to the side and at an angle. It should not be a 90-degree angle, but slightly less, maybe 65 to 70 degrees. If you are not good at geometry, just hold your hand out in front of your crotch, palm toward the ground, with your fingers and your thumb neither spread completely out nor held tight. Now match the angle the outside of your hand makes.

This helpful tip came from the book “If It Ain’t Broke, Fix It!” by Gil & Vicki Ash.

Special Note: If you are shooting pairs and the breaking points are at opposite ends of the field, point the left foot toward the break point of the second target. Wind your torso up like a spring toward the hold point of the first target. This will help you shoot the first target quickly and give you more time to hit the second.

Tip #5Have a Plan. Work the Plan.

Before you shoot, watch a better shooter and follow the same process. First, look at the target track for where you see it most clearly. This becomes your Break Point. Second, go one half to two thirds of the way back to the trap. This becomes your Hold Point. Third, cut your eyes to just in front of the trap and this becomes your Visual Point. Fourth, repeat the process with your eyes closed and visualize Break Point, Hold Point and Visual Point to imprint them in your mind.

When it is your turn to shoot, review the imprinted plan in your mind while loading your gun. Then, call for the birds and watch them break.

This tip came from Anthony Matarese’s book “Straight Shooting” and Gil and Vicki Ash’s book “The Coaching Hour Chronicles.”

Tip #4Best Loads for Sporting Clays & Focus on the Clay

Best Loads for Sporting Clays

Question: What are your thoughts on the best 12-gauge load for sporting clays regarding shot size, weight and speed? Am I handicapping myself if I shoot a lighter payload, like 7/8-ounce shells?

Answer: My advice is to stick with a shell that works for you. According to the NSCA rule book, for sporting clays and 5 Stand, if you are shooting 12-gauge lead shot, you are limited to a maximum of 1 1/8-ounce load. Shot size must be between 7 1/2 and 9.

With that out of the way, the “best load” is a matter of functionality and preference. Many semi-automatics will not operate properly unless you use a shell with enough energy to reliably activate the action. This varies from gun to gun, but I recommend a speed of 1,250 feet per second (fps) or greater when shooting a semi. For an over-and-under, I recommend any shell between 1,200 and 1,300 fps, or lighter if you are recoil sensitive. As for shot size, a larger shot, say 7 1/2, will enable you to better engage rabbits and targets that are edge-on or at longer distances. Smaller shot, such as 8 1/2 or 9, will disperse more quickly after leaving the muzzle and is more effective on closer range targets or belly/face presentations.

From Don Currie. He is NSCA’s Chief Instructor, an Orvis Wingshooting School instructor, and Master Class competitor.

Focus on the Clay!

You should focus on the clay, but during the beginning of your shot, you must know the position of your barrel relative to the target. You never want to see the barrel in crisp focus, but you need some awareness of it as you mount the gun and insert it relative to the target.

This tip came from the book “Straight Shooting for Hunters – A Champion’s Guide to Using Shotguns in the Field” by Anthony Matarese, Jr. and Will Primos.

Tip #3Recoil Sensitivity

Ask the Instructor: Don Currie, NSCA Master Instructor

Question: I am very sensitive to recoil. I want to continue to shoot a 12 gauge so I can compete in NSCA registered tournaments and don’t want to switch to a smaller gauge. I also prefer over-and-under shotguns compared to semi-autos. What do you suggest?

Answer: First, let’s understand the difference between “actual” recoil and “felt” recoil. The former is determined by physics. The latter is the shooter’s perception.

There are two ways to reduce actual recoil: 1) increase the weight of the gun, or 2) decrease the energy produced by the projectile. To decrease energy, you must reduce the weight of the projectile (the shot) or decrease the charge (gun powder). “Felt recoil” is the shooter’s perception of recoil. Reducing actual recoil also reduces felt recoil. There are a couple of things you can do to reduce felt recoil without increasing the weight of your gun or decreasing the energy of your shell.

While recoil reducers do not reduce actual recoil, they do reduce felt recoil by spreading out the impact of a gun’s recoil. Some of the most common recoil reducers on the market are the ISIS System by Recoil Systems, Gracoil by Graco and SoftTouch.

Another technique for reducing recoil is the lengthening of the forcing cones in the barrels of your gun. Much of the felt recoil from a shotgun is due to friction and pressure created in the five inches forward of the chambers. It is in this area of each barrel, called the forcing cone, where the wad and shot are forced to transition from the wider diameter of the chamber to the narrower diameter of the barrel. Forcing cones that have a steeper transition will produce greater recoil. Barrels with a more gradual transition will produce less felt recoil.

Finally, there is barrel porting. I am not a proponent of porting, as it involves putting holes in perfectly good barrels and is not as effective as lengthening of forcing cones or the use of a recoil system at reducing felt recoil.

Tip #2When things go wrong

A lot of times a breakdown in basic fundamentals will cause you to think that you have a problem with a certain clay presentation, when you really don’t. It’s not the presentation that’s the problem; it’s a breakdown of your basic fundamentals. If you’re not careful, you begin to try to fix something that isn’t broken. And that’s the worst thing you can do. So review your fundamentals first. Remember:

  • Mount
  • Break Point
  • Hold Point
  • Visual Point
  • Focus on the target
Tip #1The Basic Score Builder
  1. Choose a particular target – it can be anything you like – a rabbit, teal, incomer or crosser.
  2. Address the target some 20 yards away and attempt to break it half a dozen times straight.
  3. If successful, move back 5 yards and carry out the same exercise.
  4. With success, add an extra 5 yards and continue to push the envelope of your shooting until you fail to shoot five in a row.
  5. If you should miss at any time, you have to start over at the 20 yard mark.

This drill teaches you to focus and concentrate on every shot. It is particularly effective when practiced with a friend where a wager can introduce some pressure to your practice.

This tip came from Chris Batha’s book “Breaking Clays – Target Tactics, Tips & Techniques.”

On the Range

Experience MGAC 5-Stand.

Plan Your Visit

Ready to shoot 5-Stand?

Call the range office with questions, review the club calendar before traveling, or contact us about hosting a private event.